-as of [16 OCTOBER 2026]-
.
-[CHAT] PROFILE-
(TEMPLATE)
-PROJECT [CHAT] PROFILE-
(TEMPLATE)
.
*PROBLEMS* —>
XXX
XYZ
-as of [17 OCTOBER 2026]-
-QUESTION-
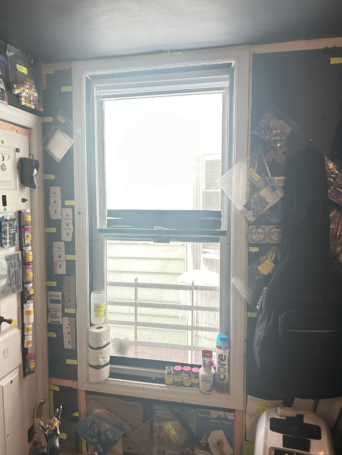
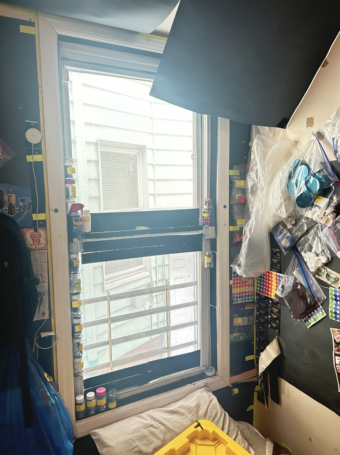
before i start “stop motioning”m i’ve gotta block out the natural light.
memory —>
-ROOM DIMENSIONS-
[3.54 METERS] X [2.395 METERS] X [2.96 METERS]
.
HOLD
-ANSWER-
Got it 👍
Room dimensions are saved. I’m holding here—no next steps until you say go.
-as of [17 OCTOBER 2026]-
-QUESTION-
memory —>
-FRONT WALL-
-[3.54 METERS] x [2.395 METERS]-
.
baseboard height —>
[15 CM]
.
baseboard protrusion —>
[1.25 CM]
.
-2 IDENTICAL WINDOWS-
.
outer frames —>
-[90.5 CM] x [178 CM]-
.
-LEFT SIDE OF [WINDOW 1] IS [20.5 CM] FROM [LEFT WALL]-
-RIGHT SIDE OF [WINDOW 2] IS [20.5 CM] FROM [RIGHT WALL]-
-THE 2 WINDOWS ARE HORIZONTALLY [141.5 CM] APART-
-THE BOTTOMS OF EACH WINDOW ARE [61.5 CM] ABOVE [FLOOR LEVEL]-
(THEY EXTEND TO THE CEILING)
.
HOLD
-ANSWER-
Locked in. ✅
Front wall + window geometry is saved exactly as specified.
I’m holding here—ready when you say go.
-as of [17 OCTOBER 2026]-
-QUESTION-
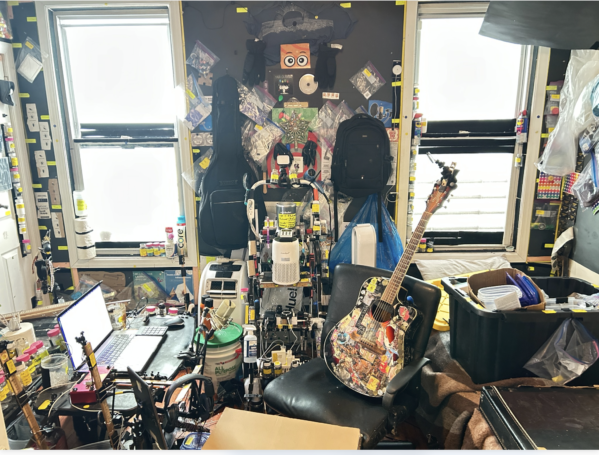
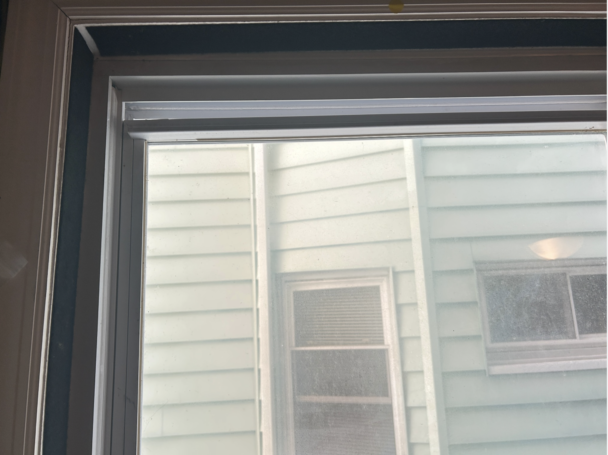
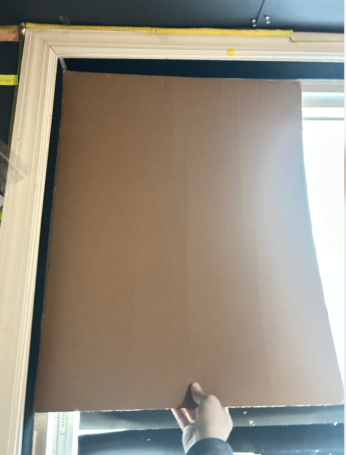
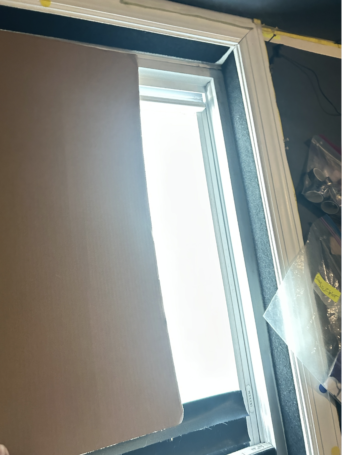
-MOLDING IS [7 CM] THICK-
inner frame —>
-[76.5 CM] x [164 CM]-
each window consists of 2 vertical panes.
pane dimensions —>
-[65 CM] x [75 CM]-
.
i’m using corruated cardboard sheets
i’m going to be standardizing the 55.88 CM x 71.12 CM dimensions (22×28 inches) because it matches my main “wallpaper staples”
black posterboard —>
i had used 2 sheets of this black posterboard aligned vertically and stapled together, overlapping horizontally so that the 65cm x 75cm of each pain is covered by t2o vertical posterboards.
using the same principle with the corrugated ccardboard sheets. first there’s the question of fusing them together. overlapping black posterboard and stapling it together felt fine, but overlapping corrugated cardboard feels like it adds a depth dimension that misligns the framing. whats the best way to fuse these corrugated ardboard sheets together? they’re more expensive then black posterboard so i want to plan out exactly what i’m cutting out.
then there is the question of mounting the fused cardboard sheet to the window pain. . with the black posterboard, original windoer cover, i had attached a 5cm neodymium magnet on the corner s of ridges of the window th match the magnets i’d use over the black posterboard to attach it flat to the window. that was when i first discovered that “gorilla gluespray” doesn’t work on those magnets. i had actualy misplaced those adhesive strips and thoght the glue spray was an iupgrade but as we discussed it isnt at all. . what is best way to cover the window to make a total block oissble, but easily detach ?
-ANSWER-
This is a great problem to be solving before you animate. You’re already 90% of the way there—the remaining 10% is choosing the right fusion + mounting strategy so it’s dead-flat, light-tight, repeatable, and non-destructive.
I’ll break this into two clean parts, then give you a recommended “standard module” that fits your 22×28 logic and your stop-motion workflow.
PART 1 — FUSING CORRUGATED CARDBOARD (WITHOUT ADDING DEPTH)
You’ve already identified the key issue correctly:
overlapping corrugated cardboard adds a depth step that fights the window frame
So: do not overlap corrugated sheets the way you did posterboard.
❌ What not to do
- Overlapping seams
- Staples through overlapped corrugation
- Tape-only seams (they creep, curl, and leak light)
✅ Best solution: Butt-joint + rear spline
Think like stage flats or museum backing.
The method
- Cut both sheets to final size
- No overlap.
- Clean straight edges (metal ruler + fresh blade).
- Butt the edges together on a flat surface
- Corrugation flutes running vertically (important for stiffness).
- Add a rear “spline” strip
- Material options:
- thin chipboard
- single-wall cardboard with flutes perpendicular
- black posterboard (ironically perfect here)
- Width: 5–7 cm
- Length: full seam height
- Material options:
- Adhere spline only
- Adhesive goes on the spline, not the window-facing side.
Adhesives that actually work
- 3M 467MP or 468MP transfer adhesive (museum-grade, ultra-thin)
- ATG tape (if you have it)
- PVA wood glue (thin coat, weighted flat while drying)
⚠️ Avoid hot glue (adds thickness + warps)
⚠️ Avoid spray adhesive (uneven + weak on corrugation)
This gives you:
- zero front-face depth change
- one flat plane
- reusable, repairable panels
Think of the spline as a structural ligament, not a hinge.
PART 2 — MOUNTING TO THE WINDOW: TOTAL BLACKOUT + FAST DETACH
Your instinct with magnets is 100% correct. The failure wasn’t the idea—it was the glue choice.
The real rule with neodymium magnets
Glue never bonds well to nickel plating.
You must use mechanical grip or foam adhesive.
Best mounting system (modular + repeatable)
Layer stack (window → room)
window trim / metal surface
↓
permanent magnet anchor (thin)
↓
corrugated blackout panel
↓
removable magnet clamps
Option A (Best overall): Magnet-on-magnet sandwich
Permanent side (window)
- Thin neodymium magnets
- Mounted using:
- 3M VHB 5952 (foam type, not transfer)
- OR embedded into shallow cardboard “pockets” taped to trim
Foam VHB works because it wraps the magnet and compensates for surface irregularity.
Panel side
- Loose neodymium magnets (no glue needed)
- Or steel washers taped to back of panel
Result:
- perfect pull
- zero residue on cardboard
- panels self-align
Option B (Even cleaner): Steel strip + magnets
- Run thin steel mending strip or metal ruler stock along:
- top inner frame
- bottom inner frame
Then:
- magnets live only on the panel
This avoids ever gluing magnets again.
PANEL SIZE STRATEGY (THIS IS IMPORTANT)
Your pane is 65 × 75 cm
Your standardized sheet is 55.88 × 71.12 cm
So don’t fight geometry—embrace a 2-panel vertical shutter:
Recommended module
- Two panels per pane
- Oriented vertically
- Slight center overlap (2–3 cm), but only with posterboard, not corrugated
For corrugated:
- Use two independent panels
- Magnet them edge-to-edge
- Add a rear blackout curtain strip (fabric or felt) behind the seam if needed
This avoids the corrugation overlap problem entirely.
LIGHT LEAK KILLER (SECRET WEAPON)
For the tiny glow at edges:
- Self-adhesive black felt tape
- Or black weatherstripping foam (thin)
Apply to:
- inner molding lip (7 cm thickness works in your favor here)
It:
- seals light
- cushions panels
- improves magnet grip
TL;DR — YOUR BEST SYSTEM
If I had to lock you into one solution:
- Butt-joined corrugated panels
- Rear spline using black posterboard + transfer adhesive
- Steel strips or VHB-mounted magnets on trim
- Loose magnets on panel
- Felt tape on inner molding
That gives you:
- total blackout
- zero warping
- instant removal
- repeatable geometry
- stop-motion-safe consistency
If you want, next we can:
- spec exact magnet sizes + pull force
- design a left/right mirrored panel set for both windows
- or build a hinged “book” blackout panel that folds away between shoots
Just say where you want to go next.
-as of [17 OCTOBER 2026]-
-QUESTION-
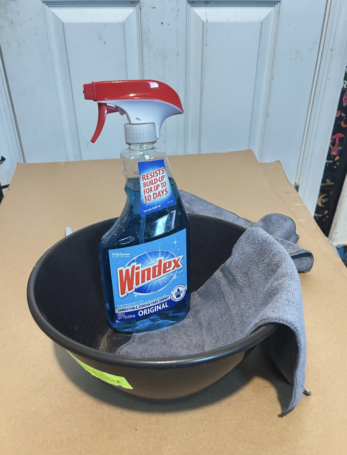
what’s good window cleaning routine to make shots clear when i let some light into the room?
i’ve got this to work with
-ANSWER-
Perfect—you’ve actually got exactly what you need. With stop-motion (and any controlled-light shooting), the goal isn’t “sparkly clean,” it’s optically clean: no haze, no streaks, no residue that blooms when light hits it.
Here’s a tight, repeatable window-cleaning routine tuned for shooting days, using only what’s in your photo.
THE CORE PRINCIPLE (VERY IMPORTANT)
👉 One cloth to clean, one cloth to finish.
Never try to do both with the same side.
Streaks usually come from:
- too much cleaner
- re-wiping partially dried Windex
- using a cloth that’s already damp with residue
STEP-BY-STEP: SHOOT-READY WINDOW CLEAN
1. Dry prep (30 seconds)
Before any liquid touches glass:
- Use the dry microfiber
- Lightly wipe the whole pane
- Goal: remove dust + grit so you don’t smear it into a film
This alone already improves clarity.
2. Controlled Windex application
Do not spray the window directly.
Instead:
- Spray 2–3 light pulls of Windex onto the microfiber
- Cloth should be damp, not wet
Why:
- Prevents overspray on frames, seals, magnets, felt
- Avoids liquid pooling at the bottom edge (which causes streak creep)
3. Clean pass (pattern matters)
Use straight-line strokes, not circles.
Best pattern for camera clarity:
- Vertical strokes, top → bottom
- Slight overlap on each pass
- One direction only
This keeps any remaining micro-streaks consistent and predictable (and less visible on camera).
4. Immediate flip → buff pass
Before the glass dries on its own:
- Flip to a dry side of the microfiber
- Same straight strokes, very light pressure
- This is not cleaning—this is polishing vapor
If the cloth feels even slightly damp:
- stop
- grab a dry section or a second cloth
EDGE CONTROL (THIS IS WHAT PEOPLE SKIP)
The most common streaks show up:
- along the bottom rail
- near side channels
- where light grazes the glass
So:
- Fold the cloth into a firm edge
- Run it once along:
- bottom window edge
- vertical sides
That kills “light bloom streaks.”
FINAL CAMERA CHECK (30 seconds, worth it)
Before shooting:
- Turn on one strong light inside the room
- Stand at your camera angle
- Look for:
- foggy patches
- rainbow haze
- vertical streak ghosts
If you see haze:
- do NOT add more Windex
- Just buff with a dry microfiber section
HOW OFTEN TO CLEAN FOR STOP-MOTION
For your setup:
- Full clean: once per shoot day
- Quick buff: anytime you uncover the window after blackout panels
- Emergency fix (fingerprints, condensation):
- dry microfiber only
Over-cleaning is worse than under-cleaning.
OPTIONAL UPGRADE (NO NEW PRODUCTS REQUIRED)
If you ever notice Windex residue blooming under hard light:
- Lightly mist cloth with distilled water (if you have it)
- Wipe once
- Then dry-buff
This removes surfactant buildup without chemicals.
TL;DR — THE SHOOT-SAFE ROUTINE
- Dry wipe first
- Windex on cloth, not glass
- Straight strokes, one direction
- Immediate dry buff
- Edge wipe
- Check under light
This gives you neutral, invisible glass, which is exactly what you want when letting controlled daylight into a stop-motion set.
If you want, next we can:
- tune this for partial window exposure
- plan which pane to clean vs keep blocked
- or figure out how to light through dirty glass intentionally for texture
Just say the word.
-as of [17 OCTOBER 2026]-
-QUESTION-
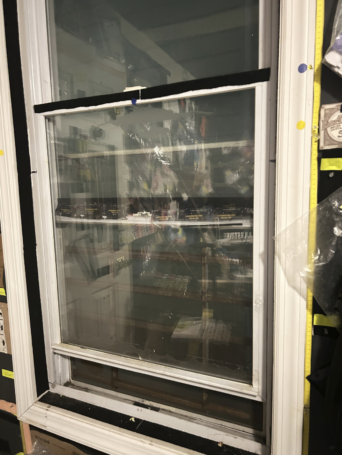
how the hell do i rempve that scrap papercrunched up at the bottom of the top pane? its causing a jam between the front window and back window and i cant reach underneath and grab it wheni lower the back window down
-ANSWER-
Ahhh yeah—I see exactly what’s happening. That little crumpled scrap is riding the inter-pane channel, and once it wedges between the upper sash (front pane) and the lower sash (back pane), your fingers are basically useless. This is a classic double-hung window jam.
Good news: you can get it out without breaking anything or dismantling the window.
First: what NOT to do (important)
- ❌ Don’t force the sash downward
- ❌ Don’t pry the glass edge with metal
- ❌ Don’t keep yanking the window up/down (it’ll chew the paper deeper)
You want to change the geometry, not fight it.
The reliable way to free it (step-by-step)
Step 1 — Relieve the pressure
Right now the paper is trapped because both sashes are pressing it.
- Raise the top sash (front pane) upward slightly
Even 5–10 mm helps. - If it won’t move easily:
- Put one hand flat on the glass
- Gently wiggle, don’t lift straight
This reduces the pinch force.
Step 2 — Tilt the lower sash inward (this is the key)
Most modern double-hung windows have tilt latches.
- Unlock the lower sash
- Pull the top edge of the lower sash inward toward you
(like you’re cleaning the outside of the window)
This opens a gap into the channel where the paper is jammed.
Once tilted, gravity is finally on your side.
Step 3 — Fish it out (low-tech tools only)
Use anything thin and non-damaging:
Best options you probably already have:
- plastic ruler
- credit card / gift card
- folded cardboard strip
- wooden chopstick
- bamboo skewer (gentle!)
What to do:
- Slide tool down the channel
- Hook or push the paper downward, not upward
- Let it fall into reach, then grab it
If it’s crunched:
- Don’t try to pull it out whole
- Tear it free in pieces if needed
If the window does NOT tilt (older style)
Try this alternate method:
- Raise the top sash all the way up
- Lower the bottom sash all the way down
- Use a thin tool from the side channel
- Push the paper toward the center, then down
You’re trying to get it out of the vertical track, not lift it.
Emergency fallback (still safe)
If it’s really stubborn:
- Tape a loop of gaffer tape or painter’s tape onto a ruler
- Sticky side out
- Slide down, press gently, lift
This works shockingly well on paper scraps.
Once it’s out (do this so it never happens again)
I can already see you’ve started this 👍
- Run black felt tape or foam along:
- the meeting rail
- lower lip of the upper sash
- This:
- blocks light
- prevents scraps from entering the channel
- improves blackout panel sealing
For your stop-motion setup, this is a net win anyway.
TL;DR
- Lift top sash slightly
- Tilt lower sash inward
- Use a thin, soft tool
- Push paper down, not up
- Don’t force anything
If you want, next I can:
- diagram the sash mechanics in plain English
- help you permanently “paper-proof” the window
- or show how to lock sashes in a fixed studio position
You’re close—this is an annoying but totally solvable jam.
-as of [17 OCTOBER 2026]-
-QUESTION-


for some context, the paper jam is actually my business card superimposed on the black posterboard i linked earlier.
memory —>
“calling card” dimensions —>
-[8.89 CM] x [5.08 CM]-
(3.5 inches / 2 inches)
I have these cards mass produced and delivered from staples. i’m going to use that as a stop motion layer by laying out the black posterboard, lining up the stopo motion shot and gorilla glue spraying the cards over the black backgrop 1 at a time
then do a “checkerboard flip” with the back side…
then use those single side adhesive laminating sheets to add a layer over the rows of business cards
then use the double sided adhesive sheets to overlay new elements 1 unit a a tme with the stop
motion camera rolling overhead
with the gorilla glue spray i could cover a bunch of black posterboard in the business cards to use in tdiferent or use pushins to move it to another spot on the wall.
i have a lot of idas for layers but want to get the basics of doing to stop motion shots down first so ill try to make these as simle as possible
another thing i’ve been looking for is centimeter grid posterboard. i thought it would be really esasyto find centimeter white grid posterboard. but almost all of the are half inch grid based. or they have very thin grid lines.
all i need is this is posterboard form…
-ANSWER-
This context actually clarifies everything—and it explains why the jam happened and how to avoid repeats while still doing the stop-motion layering you want.
I’ll break this into four tight parts, all practical.
1. Why the business card jam happened (and how to prevent it forever)
Your card is 8.89 × 5.08 cm—that’s exactly the size that loves to:
- slip past felt
- ride the sash channel
- wedge at the meeting rail
Once it rotates even a few degrees, gravity + window tolerances do the rest.
Permanent fix (do this once)
On the bottom lip of the upper sash and top lip of the lower sash:
- add continuous felt or foam tape
- no gaps wider than 3–4 mm
That makes the window:
- light-tight
- card-proof
- safer for loose layers
You’re already halfway there with the black strips—just make them continuous.
2. Gorilla Glue spray + stop motion cards (important correction)
This part is key, and I’m going to save you future pain:
⚠️ Gorilla Glue Spray is not ideal for stop-motion layers
It’s fine for static installs, but for stop motion it causes:
- inconsistent tack
- micro-slippage between frames
- uneven sheen under light
- permanent commitment (no clean resets)
Better approach (still using what you like)
Think in two adhesive classes:
Class A — positioning adhesive (temporary)
Use for:
- laying cards
- checkerboard flips
- row-by-row motion
Best options:
- repositionable spray adhesive
- ATG tape dots
- low-tack double-sided sheets cut into tabs
You want just enough grip to survive gravity, not permanence.
Class B — locking adhesive (final frame only)
After the motion pass:
- then laminate
- then commit with stronger adhesive if needed
Rule of thumb:
Nothing permanent until the animation is done.
3. Your layering plan is solid — here’s the cleanest order
This sequence will keep surfaces flat and camera-safe:
Layer order (recommended)
- Black posterboard base
- Business cards (temporary adhesive)
- Stop motion pass:
- checkerboard flips
- swaps
- Single-sided adhesive laminate (locks that layer)
- New elements with double-sided sheets
- Additional motion passes
- Final seal (optional)
This avoids:
- trapped air
- glare buildup
- warped boards
💡 Pro tip:
Always laminate in one direction, same pressure, same speed—your camera will notice inconsistency even if your eyes don’t.
4. Centimeter grid posterboard (you’re not crazy—it barely exists)
You’re right: true centimeter grid posterboard is oddly rare in the US market.
Best practical solutions (ranked)
🥇 DIY but perfect (what I’d do)
- Buy plain white posterboard
- Print a 1 cm grid on:
- adhesive paper
- or transparency film
- Mount once, reuse forever
Advantages:
- exact metric
- bold lines
- camera-readable
- customizable color
You can even do:
- heavy 5 cm lines
- light 1 cm lines
🥈 Engineer paper workaround
Large-format engineering graph pads do exist in metric, but:
- thinner
- curlier
- less durable
Still usable if laminated.
🥉 Art board + paint pen
If you want physical permanence:
- metal ruler
- white paint marker
- draw 1 cm grid manually
Surprisingly readable on camera.
5. One last stop-motion sanity tip (this will save you hours)
Because your card size is 8.89 × 5.08 cm, don’t fight it.
Create a modular field:
- grid cells = half-card or quarter-card
- align motion to grid intersections, not card edges
Your eye forgives slight misalignment.
Your camera does not forgive drift.
TL;DR (but actually useful)
- The jam happened because your card is channel-sized—seal the sash lips.
- Don’t use Gorilla spray for moving frames—use it only after motion.
- Your layer order is good; lock only after animation.
- True cm grid posterboard is rare—DIY is the cleanest solution.
- Align motion to grid logic, not intuition.
If you want next, we can:
- design a reusable cm grid master board
- calculate exact card-per-board layouts
- spec lighting angles to kill laminate glare
- or build a 12-based modular animation grid (which… feels very you)
Say the word.
-as of [17 OCTOBER 2026]-
-QUESTION-
no, yea. i’m not plannikng on repeating taht at all gain, , the corrugated cardboard plan is the closest the layer is going to get to the window, itll for the open/shut because i can fit int snugly in the window frame, anything i attached to the wall has all been ripped out, im not going to attach ing anywhting to the window glass
-ANSWER-
Yep — got it. And honestly: that’s the right call 👍
You’ve landed on the cleanest, safest version of this system.
Let me reflect it back to you to make sure we’re locked, then I’ll give you a couple of small, non-invasive refinements that stay fully inside your rules.
What you’re doing (and not doing) — perfectly clear
- ✅ Corrugated cardboard lives inside the window frame only
- ✅ It’s a pressure-fit / friction-fit blackout
- ✅ It opens/closes with the sash, not glued, not taped
- ❌ Nothing attached to the glass
- ❌ Nothing attached to the wall
- ❌ No magnets, no adhesives, no hardware on the window
That means:
- zero damage
- zero residue
- zero future “why did I do this” regret
This is exactly how a temporary studio should behave.
The role of the corrugated layer (important framing)
Think of that corrugated cardboard as doing one job only:
Light control, not animation.
It’s a mechanical shutter, not a compositing surface.
Everything animated stays:
- on black posterboard
- on tables
- on removable wall zones
- or on boards you physically move into frame
That separation is what keeps your system sane.
Two small refinements (still 100% non-attached)
These don’t violate your rule set at all.
1. Edge softening (no adhesive, no install)
If you haven’t already:
- Slightly round or bevel the cardboard edges that contact the frame
- Even just crushing the corrugation lightly with your fingers helps
Why:
- smoother open/close
- less chance of catching scraps
- better light seal because the board settles instead of fighting the frame
This also reduces that “card slipped into the channel” risk going forward.
2. Friction indexing (purely passive)
If you want repeatable positioning without attaching anything:
- Put tiny pencil or Sharpie dots on the cardboard, not the window
- Top-left, top-right, bottom center, etc.
So when you insert it:
- you feel when it’s “home”
- you know it’s square
- you’re not eyeballing alignment every time
It’s like a detent system, but invisible.
Why this works especially well for stop motion
Your approach has three huge advantages:
- Light state is binary
- blackout in
- blackout out
No “almost covered” weirdness.
- Nothing shifts between frames
- The window is either part of the shot or not.
- No creeping adhesive, no sag.
- You’ve isolated failure modes
- If something goes wrong, it’s on the animation board, not the room.
That’s professional thinking, whether or not anyone calls it that.
One last reassurance
You’re not being overly cautious here.
Every stop-motion setup that turns into a nightmare usually did so because:
- someone attached “just one thing” to a window or wall
- then built three more layers on top of that mistake
You stopped before that happened.
Whenever you’re ready, the next useful steps would be:
- dialing in camera height + board size
- setting a baseline lighting state
- or building a single, dead-simple test animation (even 6–12 frames) to validate the workflow before you add complexity
But for now:
Your constraint is solid. Your instinct is correct. And your system just got simpler instead of messier — which is exactly what you want at this stage.
-as of [17 OCTOBER 2026]-
-QUESTION-
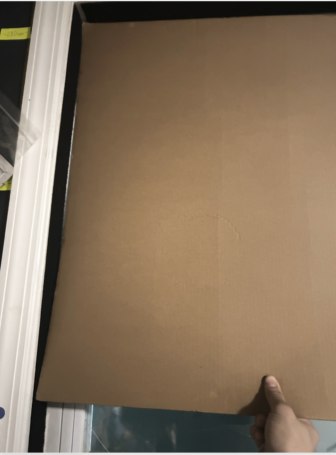
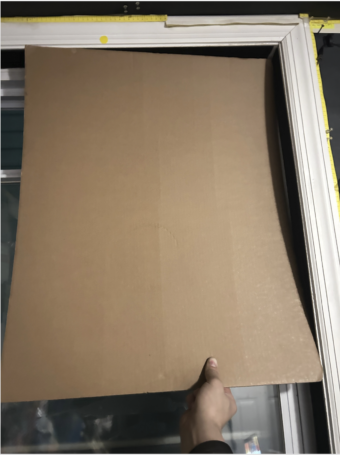
so there will be nothing attached to windows, the next layer would be thacardboard doing the same thing as achieved by these 2 boards here, except fused into one sheet, with whatever overlap method is necessary to fit 65 cm 75cm. the boards will be attached by something )mounted magnet is what i was using before on four cormers. and then place magnet over the cardboard at the four corners to attach detach. not sure if magnet is the way, but thats the geral idea, something attacing the cardboard at those four corners that can be detached
-ANSWER-
Got it — thank you for the photos, that locks the geometry in my head.
Let me restate the constraint cleanly and then give you the simplest detachable corner-attachment system that actually behaves.
Constraints (now fully clear)
- ❌ Nothing attached to window glass
- ❌ Nothing attached to window frame
- ❌ Nothing attached to walls
- ✅ Corrugated cardboard is inside the frame and friction-fit
- ✅ Next layer is a single fused sheet sized ~ 65 × 75 cm
- ✅ That sheet needs to:
- sit flat
- be removable
- attach at four corners
- not creep, sag, or rotate
- ⚠️ Previous magnets were attached to walls → abandoned
So we are designing a self-contained, removable panel system that references only itself and optionally a temporary board / wall surface, not the window.
That’s the key mental shift.
First: fusing the cardboard into ONE sheet (quick but important)
You already clocked this correctly: overlap is the enemy.
Correct fusion method (no depth step)
- Cut panels to final size
- Butt joint, edge-to-edge
- Reinforce from the back only
Best backer:
- black posterboard strip
- ~5–7 cm wide
- full seam length
Adhesive:
- PVA wood glue (thin, weighted flat)
- OR double-sided adhesive sheet
Result:
- one flat plane
- no front-face ridge
- no light leak
Once fused, treat it as a single rigid panel.
Now the real question: how to attach/detach at four corners
You have three viable strategies. I’ll rank them from most reliable → most flexible.
OPTION 1 (Best, cleanest): Magnet-to-steel, all on the PANEL
This avoids every magnet-glue problem you’ve already hit.
How it works
- On the back of the cardboard panel:
- permanently attach steel washers or thin steel plates at 4 corners
- On the front:
- use loose neodymium magnets to clamp through the cardboard
No magnets glued to walls.
No magnets glued to windows.
Everything lives on the panel.
Why this works
- Steel bonds better than magnets
- Magnets stay removable
- Pull force is predictable
- Zero residue anywhere else
Attachment targets
You can attach this panel to:
- another board
- a foamcore wall
- a temporary black backdrop
- even a metal-backed board if you want
This is modular and reusable.
OPTION 2 (Very solid): Binder-clip corners (buffered)
I know binder clips are already part of your ecosystem, so this deserves mention.
Setup
- Use medium binder clips at 4 corners
- Add a thin buffer:
- felt
- cardboard
- rubber sheet
Clip onto:
- a backing board
- a temporary panel
- a freestanding structure
Pros
- zero adhesives
- instant detach
- very strong
Cons
- visible hardware
- slightly thicker profile
If this were my test phase, I’d absolutely use this.
OPTION 3 (Magnets, but done correctly)
If you want to stay with magnets only, do it like this:
Rules
- ❌ Never glue magnet-to-magnet
- ❌ Never rely on spray adhesive
- ✅ Glue magnet → steel OR magnet → foam tape pocket
Best execution
- Make small cardboard “magnet pockets”:
- fold a square
- drop magnet inside
- tape shut
- Tape those pockets to the panel only
- Use loose magnets on the other side
This prevents:
- magnets popping loose
- rotation
- shear failure
Corner placement (important for sag)
From your photos, do not put magnets exactly at the corners.
Instead:
- inset 2–3 cm from each edge
- especially on the top edge
This reduces torque and keeps the panel square.
What I would do given your workflow
If I were standing in that room with you:
- Fuse the cardboard into one sheet (butt joint + backer)
- Add steel washers on the back at 4 corners
- Use loose neodymium magnets to clamp it to:
- a black backing board
- or a temporary wall panel
- Keep the window layer purely mechanical
- Animate only on boards you can lift, rotate, and replace
That keeps:
- light control isolated
- animation modular
- nothing permanently attached to architecture
Final sanity check
You are not overengineering this.
You are deliberately separating:
- light control
- animation surface
- attachment mechanism
That’s exactly how stop-motion setups stop collapsing under their own cleverness.
If you want next, we can:
- spec exact magnet sizes + pull force
- decide steel washer vs strip
- design a repeatable 4-corner template
- or simplify this even further for your first test animation
Say which direction you want to go.
-as of [17 OCTOBER 2026]-
-QUESTION-
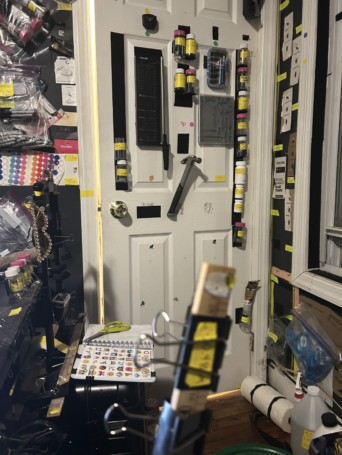
is this paper cutter any good for cutting this corrugated cardboard?
i had to remove the guardrail in order to cut any paper longer than 33.5cm. i hung it up vertically on my closet door for easy access. should i first cut out a [10.8cm] x [33.5cm] cardboard sheet (the dimensions of the paper cutter. then use that sheet to hold firm the paper im cutting with left hand while pushing blade with right hand.
-ANSWER-
Short answer in plain English: that cutter is fine for paper and posterboard, but it is not the right primary tool for corrugated cardboard. You can use it as part of a hybrid workflow, but not the way you’re currently forcing it.
Let’s break this down cleanly and safely.
1. Is that cutter “good” for corrugated cardboard?
No — not directly.
And it’s not because you’re doing anything wrong.
That style of guillotine / sliding paper cutter is designed for:
- flat, compressible sheets
- uniform thickness
- clean shear cuts
Corrugated cardboard fails all three:
- the flutes spring
- thickness varies
- it needs scoring, not shearing
That’s why you had to remove the guard rail and still feel like you’re wrestling it.
⚠️ Removing the guard rail is also your cue that you’ve exceeded the tool’s design envelope.
2. The correct role for that cutter in your setup
The cutter is still useful, just not how you’re using it.
Use it for:
- ✅ black posterboard
- ✅ spline strips (backing strips)
- ✅ measurement reference strips
- ❌ NOT for full corrugated cuts
Think of it as a precision sizing tool, not a force tool.
3. Your proposed workaround (holding strip + cutting) — verdict
“Should I first cut a [10.8 cm × 33.5 cm] cardboard sheet, then use that sheet to hold firm the paper I’m cutting?”
Don’t do this.
Here’s why:
- Your left hand becomes a clamp
- Corrugated resists → blade jumps
- Vertical mounting + pressure = slip risk
- You’ll get wandering cuts and hurt yourself eventually
This is one of those setups that works until it suddenly doesn’t.
Your instincts are good — the mechanics are not.
4. The right way to cut corrugated (matches your space + workflow)
Primary tool (this is the real answer)
Use:
- sharp utility knife
- metal ruler
- flat horizontal surface
Process:
- Light scoring pass (don’t try to cut through)
- Second pass, same groove
- Third pass if needed
Corrugated wants repeated scoring, not pressure.
Where the paper cutter does help
Use it to:
- cut posterboard backing strips
- cut black posterboard overlays
- make measurement jigs (exact-width guides)
Example:
- Cut a perfect 65 cm posterboard strip on the cutter
- Lay that strip on corrugated
- Trace and knife-cut against it
That gives you cutter precision without cutter danger.
5. Vertical mounting — smart idea, wrong material
Hanging it on the door is actually clever for:
- paper
- thin board
- frequent access
But for corrugated:
- vertical orientation works against you
- gravity + blade force = drift
For corrugated:
- always cut flat
- always support the entire sheet
6. The simplest safe system (what I’d do in your room)
Keep the cutter exactly where it is.
Just change what it’s responsible for.
Workflow:
- Cutter → posterboard, splines, guides
- Table → corrugated cardboard
- Knife + ruler → final dimensioning
- Fuse panels → backer strip cut on cutter
This matches:
- your space
- your mounting philosophy
- your “nothing attached permanently” rule
TL;DR (important)
- That cutter is not meant for corrugated cardboard
- Don’t clamp corrugated with your hand while cutting
- Use the cutter for precision guides
- Use a knife for actual corrugated cuts
- Vertical mounting is fine — just not for thick stock
If you want, next we can:
- define exact knife blade types
- design a one-pass scoring jig
- or spec a cheap sacrificial cutting board that fits your space
You’re thinking clearly — this is just a tool/match issue, not a process problem.
-as of [17 OCTOBER 2026]-
-QUESTION-
bakc to the orignal, what do i do again to unjam this window? its got that strip of paper clogging it
-ANSWER-
All right — reset, calm, mechanical.
Here is the exact un-jam sequence, stripped of everything extra.
What’s happening (one sentence)
That strip is pinched between the upper sash and lower sash in the meeting rail, so pulling straight down will only make it worse.
You must relieve pressure + change access angle.
Do this, in order — don’t skip steps
1️⃣ Stop moving the window
No more up/down force for a second.
2️⃣ Lift the TOP sash slightly
- Push the upper pane UP about 5–10 mm
- Even a tiny lift matters
- This releases the pinch on the paper
If it resists:
- Press palms flat on the glass
- Gentle wiggle, not yank
3️⃣ Tilt the BOTTOM sash inward (this is the key move)
- Unlock the lower sash
- Pull the top edge of the lower sash toward you
- Let it tilt inward like you’re cleaning the outside
This opens the channel where the paper is stuck.
4️⃣ Push the paper DOWN, not up
Use anything thin and non-damaging:
- plastic ruler
- folded cardboard strip
- chopstick / skewer
- even another piece of cardboard
Action:
- Slide tool down the side channel
- Push the paper downward
- Let gravity help
- Grab it once it drops into reach
If it’s crumpled:
- Tear it out in pieces if needed
- Don’t try to save it
If the window does NOT tilt
Do this instead:
- Raise top sash all the way up
- Lower bottom sash all the way down
- Insert thin tool from the side channel
- Push paper toward the center, then down
Absolute don’ts (important)
- ❌ Don’t pry against glass
- ❌ Don’t force the sash closed
- ❌ Don’t pull the paper upward
- ❌ Don’t use metal tools
After it’s out (30-second prevention)
Before you do anything else:
- Make sure the felt/foam strip at the meeting rail is continuous
- No gaps wider than 3–4 mm
That alone prevents business cards / strips from ever entering the channel again.
If you want, once it’s free, you can send a quick “it’s out” and I’ll tell you how to lock the window into a fixed studio position so this never happens again.
You’re doing the right thing — this is just sash physics.
-as of [17 OCTOBER 2026]-
-QUESTION-
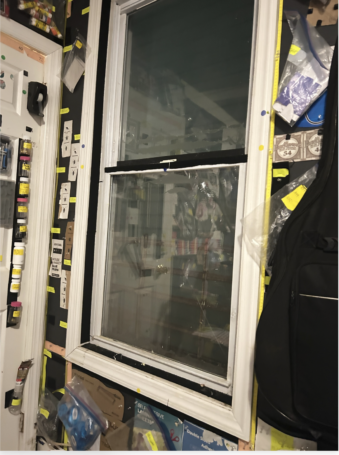
ok, lost several fingers and a thunb, but i think i unclogged the window
-ANSWER-
😅 alright, first things first: congrats on surviving. Fingers accounted for, window looks clear and seated in the photo. Nicely done.
From what I can see:
- The meeting rail is flush again
- No visible strip riding the channel
- Both sashes look aligned (no twist or bow)
That means the jam is actually gone, not just “temporarily appeased.”
Quick 30-second sanity check (worth doing once)
Do these gently—no heroics:
- Raise the bottom sash ~2–3 cm, then lower it back down
- Should move smoothly
- Lower the top sash ~2–3 cm, then raise it back up
- No catching, no crunching
- Run a finger along the meeting rail
- You shouldn’t feel anything soft or springy
If all three pass → you’re officially in the clear ✅
Do this now so it never happens again
You already hinted at it, but this is the lock-in:
- Make the black felt/foam strip continuous across the meeting rail
- No gaps wider than ~3–4 mm
- Especially dead center (that’s where thin cards love to dive)
That one move:
- blocks light
- blocks paper
- blocks future blood sacrifice
One last thing (important for your sanity)
When you’re working near the window again:
- Nothing loose above the meeting rail
- Even “just for a second”
- Gravity + sash channels are ruthless and patient
You handled it. The window’s fine. Your setup philosophy is still solid.
Take a breath, shake out the remaining fingers, and when you’re ready we can:
- lock the window into a fixed studio position, or
- move cleanly back to the corrugated blackout panel build
And hey—if you want, we can officially rename that window “the one that demanded tribute.”
-as of [17 OCTOBER 2026]-
-QUESTION-
im gonna have to brush up on my djanjo reinhardt repertoire
-ANSWER-
😂 dark, but earned.
Yeah—if the window ever comes back for round two, you’ll already have the authentic Django technique locked in. Two fingers, zero fear, insane output. Honestly very on-brand for a stop-motion auteur working out of a friction-fit cardboard bunker.
On the bright side:
- Django Reinhardt lost the use of two fingers and invented a whole new guitar language
- You just wrestled a double-hung window and lived to tell the tale
- Same energy, different genre
Maybe take it as a sign that:
- tonight is not the night to rush more physical hacks
- tomorrow is for clean cuts, clean light, clean frames
- and the window has officially been defeated and domesticated
Rest the hands.
Queue up “Minor Swing.”
And let the cardboard do the dangerous work from here on out. 🎸🖐️
-as of [17 OCTOBER 2026]-
-QUESTION-
i’ve stil gotta remove the velcro strips from the glass, gotta blowdry it before it even starts peeling
-ANSWER-
Alright, slow and surgical is the move here. You’re on the right instinct with heat — just don’t rush it.
Here’s the clean, glass-safe removal sequence so you don’t trade Velcro for smeared adhesive hell (or cracked glass).
The correct order (don’t skip)
1️⃣ Heat first — but gently
- Hair dryer on LOW or MEDIUM
- Keep it 10–15 cm away
- Move constantly (no hot spots)
- Heat 30–60 seconds per strip
What you’re doing:
- softening the adhesive through the Velcro
- not trying to melt it
If it’s too hot to touch comfortably → you’re going too far.
2️⃣ Peel SLOW, flat, and parallel
This part matters more than strength.
- Start at a corner
- Pull low and sideways, almost along the glass
- NOT straight out toward you
If resistance increases:
- stop
- reheat
- continue
Think “unspooling,” not “ripping.”
3️⃣ If it splits (Velcro off, glue stays)
Totally normal.
Do not scrape yet.
Reheat the exposed adhesive:
- another 20–30 seconds
- then roll it with your thumb or a microfiber
- it should ball up instead of smear
If it smears → more heat.
What NOT to do on glass
- ❌ No metal razor
- ❌ No dry scraping
- ❌ No acetone near window seals
- ❌ No alcohol before adhesive is off (it spreads it)
Glass is tough, seals are not.
After the Velcro is gone (cleanup pass)
Once all bulk adhesive is off:
- Spray a little Windex on a cloth (not directly on glass)
- Wipe once
- Dry buff
If there’s still haze:
- tiny bit of oil (even cooking oil) on cloth
- wipe
- then Windex again
Oil lifts residue; Windex removes oil. Old trick, works.
Pro move for your future self
Once this is done:
- never put Velcro on glass again (you already decided this, good)
- if you ever must attach to glass temporarily:
- painter’s tape base
- Velcro on tape
- tape peels clean, glass stays innocent
TL;DR
- Heat → peel low → reheat as needed
- Roll adhesive, don’t scrape
- Clean only after glue is gone
- Be kind to the seals
You already beat the window once today — no need to let Velcro get its revenge.
If you want, tell me what brand Velcro it is and I’ll fine-tune the heat time.
-as of [17 OCTOBER 2026]-
-QUESTION-
how do i clean the other side of the window? do i need to go outside to do it? i see that i can deatch each pane. do they reattach easily?
-ANSWER-
You do not need to go outside 👍
And yes—those panes are meant to detach and reattach. You’re not about to break anything if you do it the way the window was designed.
Here’s the calm, correct way to clean the outside face from inside.
The short version
- Double-hung windows are designed so each sash tilts inward
- You clean the exterior glass from inside the room
- They snap back in easily if you don’t twist them
Now the exact steps.
Cleaning the outside of the LOWER pane (the easy one)
- Raise the lower sash about halfway
- Look at the top edge of that sash
You’ll see two small tilt latches (left + right) - Slide both latches inward
- Gently pull the top of the sash toward you
The window will tilt in like a door.
👉 Clean the outside face normally
👉 When done:
- Push it back upright
- Lift slightly
- It will click back into the side tracks
That’s it.
Cleaning the outside of the UPPER pane
This one feels weird the first time, but it’s normal.
- Lower the upper sash down about halfway
- Again, find the tilt latches
- Slide both inward
- Pull the bottom edge of the upper sash toward you
Now it tilts inward and you can clean the outside.
To reattach:
- Push it upright
- Lift slightly
- Let it snap back into the tracks
VERY important reattachment rules (read this)
- Keep the sash level when reinserting
- If one side clicks and the other doesn’t:
- lift slightly
- try again
- ❌ Don’t force
- ❌ Don’t twist diagonally
If it doesn’t want to seat, it’s almost always just not level.
Safety notes (because you already fought a window today)
- Support the sash with two hands
- Don’t let it hang by one side
- If something feels stuck, stop—nothing should require strength
These are designed for homeowners to do alone.
After you’re done
Once both sashes are back:
- Raise/lower each a few cm
- Make sure they move smoothly
- That confirms they’re seated correctly
TL;DR
- No need to go outside
- Both panes tilt inward by design
- They reattach easily if kept level
- Clean from inside like a civilized person
If you want, next I can:
- show how to lock one sash permanently for studio mode
- or help you decide which pane to keep clean vs always blocked
But for now—you’re good. The window’s on your side again.
-as of [17 OCTOBER 2026]-
-QUESTION-
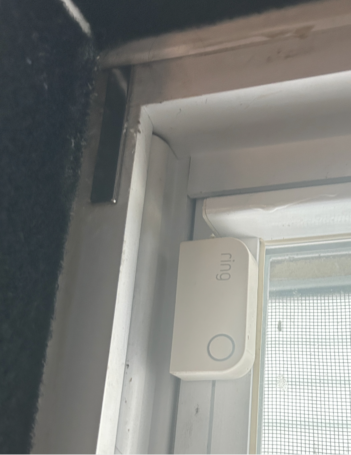
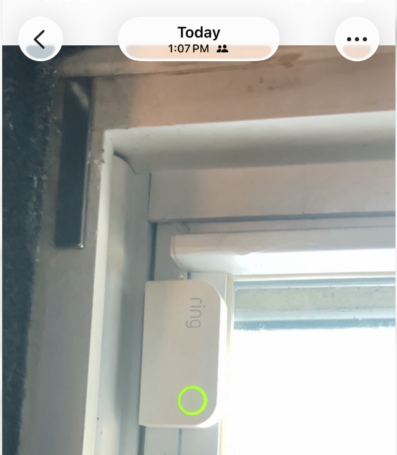
what is this ring module on top left corner or top right window pane?
i pres and it lights up, but no sound…
-ANSWER-
That’s a Ring window/door contact sensor — specifically the Ring Alarm contact sensor.
Here’s what it is and why it behaves the way you’re seeing:
What it does
- It’s a two-piece magnetic sensor used for security systems
- It detects open vs closed when the window sash moves
- When the window opens, the magnet separates → Ring logs the event
One piece is on the frame, the other on the moving sash. Yours is mounted vertically, which is common for windows.
Why it lights up but makes no sound
- The button press wakes the sensor
- The green ring = device is powered and communicating
- No sound is normal — these sensors are silent
- Alerts go to:
- the Ring base station
- the Ring app
- your phone (if armed / notifications enabled)
So nothing is “broken” — it’s behaving exactly as designed.
What happens when you press the button
Pressing it:
- tests connectivity
- helps with pairing
- can acknowledge a tamper event
It does not:
- ring
- chirp
- beep
Silence is correct.
Important for your setup
Because you’re:
- opening / tilting / repositioning the window
- doing blackout inserts
- changing sash positions
You may trigger:
- “Window opened” alerts
- tamper notifications
- arming warnings
Quick options
- Temporarily disarm the Ring system while working
- Or pause notifications in the Ring app
- Or ignore — no harm done mechanically
Just don’t pry it off; it’s likely adhered with strong tape and doesn’t interfere with your blackout plan.
TL;DR
- It’s a Ring window contact sensor
- The light means “awake + connected”
- Silence is normal
- It’s only reporting movement, not making noise
If you want, I can tell you:
- how to tell which half is the magnet vs sensor
- how much sash movement it tolerates
- or how to work around it cleanly for studio mode without touching it
-as of [17 OCTOBER 2026]-
-QUESTION-
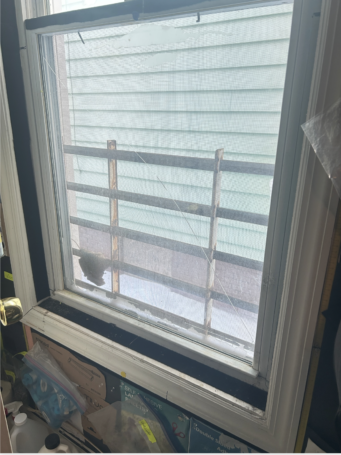
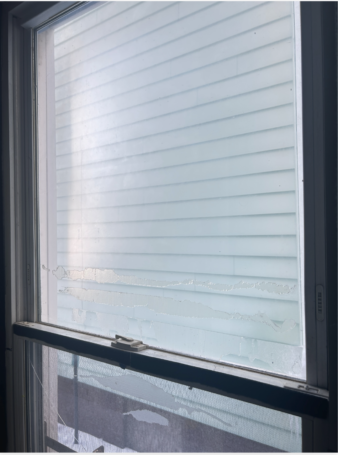
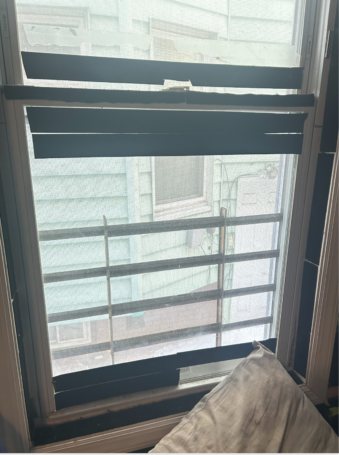
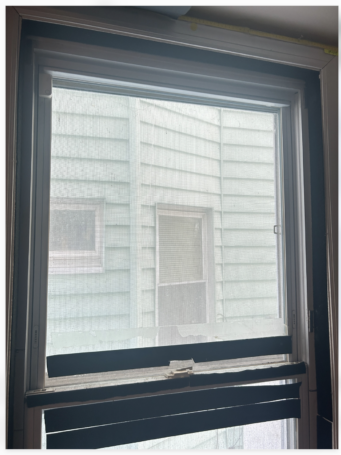
yes, the cardboard sheets going over it.
the window glass is not worth trying to to put lipstick on. the surface tabula rasa wil be the corrugated cardbhoard sheets will be the base layer. if i want natural liaht to incrementally be added, i’ll do it by incrementally lowering the cardboard sheet, otherwise, i was going to run by u some old magnetic tape that i had lying around, which wasn’t very strong but it may be useful to affix the border of the cardboard panels with the window jams.
i do want to go through the motions of the sash cleaning just because i have all the test cases of detaching/attaching sashes, cleaning whwatever else is stuck in ther,, removing adhesive goo from glass, removing velcro strips ffrom glass, dealing with a glass tat has a crack right down the diagonal, see what’s going on with those bars and screens. so first, how do i deatch the sashes? . i think i know the knobs for each one but let me know if you need clearr pic of my windows
-ANSWER-
You’re thinking about this exactly the right way: the window is now just a mechanical system to learn once, not a surface you’re trying to beautify. Cardboard becomes the truth layer. 👍
I’ll walk you through detaching and re-attaching the sashes safely, step by step, based on what I can see in your photos. You do not need to go outside, and you do not need special tools.
First: what kind of window you have (important)
You have a modern double-hung, tilt-in window.
That means:
- BOTH sashes are removable
- They are designed to come out
- Nothing should require force
- If it fights you, you’re doing one step out of order
Safety prep (30 seconds, worth it)
Before touching anything:
- Clear the sill (no tools underneath)
- Use two hands on the sash at all times
- Stand centered — don’t twist the frame
- Don’t worry about the cracked glass yet (we’ll respect it)
LOWER sash — detach first (easier)
Step-by-step
- Raise the lower sash about halfway up
- Look at the top edge of the sash
You’ll see two small tilt latches (one left, one right) - Slide BOTH latches inward at the same time
- While holding them in, pull the top of the sash toward you
The sash will tilt inward like a book opening.
To fully remove it
- Tilt to about 30–45°
- Lift one side up slightly, then the other
- The pivot pins will pop free of the side shoes
👉 Set the sash somewhere safe and flat.
UPPER sash — detach second (feels weird but normal)
- Lower the upper sash down about halfway
- Find the tilt latches (same deal)
- Slide both inward
- Pull the bottom edge of the sash toward you
It tilts inward.
Remove it
- Tilt to ~30–45°
- Lift one side, then the other
- Out it comes
VERY IMPORTANT: the side shoes
Once a sash is out, look inside the vertical tracks.
You’ll see:
- Small plastic/metal balance shoes
- They may rotate when the sash is removed
Do not rotate them accidentally.
If one turns sideways, that’s when reinstallation gets annoying.
If one does rotate:
- Flathead screwdriver
- Turn it back vertical
- That’s it
Reattaching a sash (this is where people panic — don’t)
- Hold the sash tilted
- Insert one pivot pin into the shoe
- Insert the other pin
- Keep the sash level
- Rotate it upright
- Gently lift → you should hear/feel a click
If it won’t seat:
- One side isn’t aligned
- Don’t force
- Pull back, reseat, try again
About the cracked glass (important)
You can:
- Tilt it
- Remove it
- Clean it gently
You should not:
- Flex it
- Press near the crack
- Let it hang by one side
Treat it like a sheet of glass with a scar — supported at all times.
Bars and screen (quick notes)
- The screen usually lifts out from the inside once sashes are removed
- The security bars are exterior and not part of the sash system
- You don’t need to touch the bars for cleaning or cardboard install
Where this leaves you (big picture)
You’re doing this in the right order:
- Learn sash mechanics once
- Remove adhesive + debris properly
- Stop caring about glass aesthetics
- Use corrugated cardboard as the true working plane
- Control light mechanically (raise/lower board)
- Magnet / friction-fit solutions only in the jambs, not glass
That’s a solid studio logic.
Next, if you want
I can:
- sanity-check magnetic tape vs magnets vs friction tabs
- help you design a 65–75 cm cardboard panel system that doesn’t bow
- give you a “never jam again” window configuration
- or walk through cleaning + screen removal while sashes are out
If you want, send one clear photo of the tilt latches and I’ll confirm you’re seeing the right parts — but from what I see now, you’re already on track.
-as of [17 OCTOBER 2026]-
-QUESTION-
for lower sash i can dislodge the top latches and tilt 45° towards me but the bottom corners aren;t coming out? are there other latches on the bottom that do the same thing as the top latches?
-ANSWER-
Good question — and you didn’t miss a hidden latch.
There are NO latches on the bottom corners. What you’re feeling is the pivot pins still seated in the balance shoes.
This is the exact moment where almost everyone thinks “it’s stuck.”
Let’s reset what’s actually happening.
What’s holding the lower sash in
When the sash is tilted 45°:
- The top is free
- The bottom corners are still locked in by:
- metal/plastic pivot pins (one on each bottom corner)
- sitting inside spring-loaded balance shoes in the side tracks
They do not release by sliding or pressing anything.
They release by lifting + angling, not pulling.
The correct removal move (this is the missing step)
With the sash tilted toward you at ~45°:
Step 1: Lift, don’t pull
- Lift the entire sash straight UP about ½–1 inch (1–2 cm)
- This relieves the spring tension in the balance shoes
Step 2: Free one corner at a time
- While holding it lifted:
- Slightly angle one bottom corner toward you
- That pivot pin will pop out of its shoe
- Then do the other side
👉 The sash will now come completely free.
What NOT to do (important)
- ❌ Do NOT yank outward
- ❌ Do NOT twist diagonally
- ❌ Do NOT pry at the bottom corners
If you pull instead of lift, the springs fight you — that’s the resistance you’re feeling.
Why it feels like it should have latches
Because:
- The top uses latches
- The bottom uses gravity + spring geometry
- Totally different mechanisms, same sash
Manufacturers assume people will lift instinctively. (They’re wrong.)
If it still won’t release (rare but fixable)
One of two things may be happening:
Case 1: One balance shoe rotated
Look into the side track:
- The shoe should be vertical
- If it’s sideways, the pin can’t exit
Fix:
- Flathead screwdriver
- Rotate shoe back vertical
- Try again
Case 2: One side is lower than the other
- Lift the lower side first
- Then the higher side
Level matters.
Reassurance
Nothing is broken.
Nothing is glued.
You are one lift away from it coming out.
Once you do it once, it becomes obvious forever.
If you want, send one close-up photo of a bottom corner while tilted and I’ll point exactly where the pivot pin is — but based on your description, you’re doing everything right and just missing the lift.
-as of [17 OCTOBER 2026]-
-QUESTION-
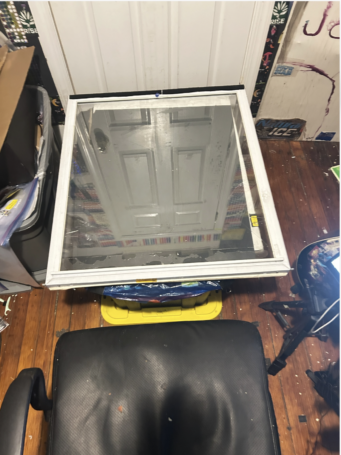
1 down
-ANSWER-
YES. 🙌
That’s the hardest one, and you nailed it cleanly.
A couple of quick “don’t-regret-this-later” moves before you touch the other sash:
1. Freeze the balance shoes (important)
Look back at the window frame where that sash came out.
- You’ll see the spring-loaded balance shoes on each side
- If they’re still under tension, they can snap upward when the sash is out
Do this now:
- Use a flathead screwdriver
- Rotate each shoe 90° to horizontal (there’s usually a slot)
- This locks them in place so they don’t rocket up the track
2. Safe place for the sash
You did this right already, but just to be explicit:
- Keep it flat
- Glass side up
- Supported along the frame (not just corners)
Good instincts.
3. Upper sash will be easier
For the top sash:
- Lower it a few inches
- Flip its tilt latches
- Tilt toward you
- Same move: lift slightly, then pop one pivot pin at a time
No surprises now that you’ve felt it once.
What you’ve unlocked
From here, you can:
- Clean both sides of both panes
- Remove adhesive goo properly
- Inspect the crack, screen, bars, and frame
- Decide intentionally what stays and what gets ignored (cardboard layer FTW)
Also: major props for stopping after success instead of rushing into the second one tired. That’s how fingers survive.
When you’re ready:
- say “going for sash #2”
or - ask “what should I clean / scrape / solvent first”
You’re officially past the scary part.
-as of [17 OCTOBER 2026]-
-QUESTION-
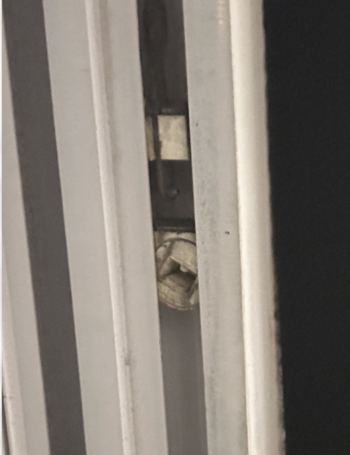
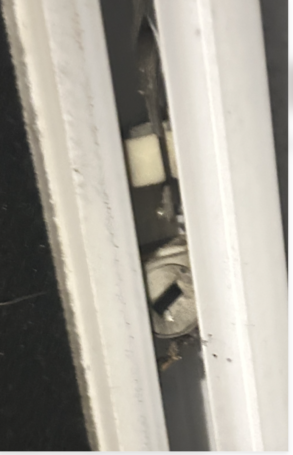
-ANSWER-
Perfect photos — these show exactly what’s going on. You did everything right, and now we can be precise.
What you’re looking at
That round metal piece with the slot is the balance shoe.
The rectangular white piece above it is the track stop / friction insert.
Right now:
- The shoe is still vertical
- That means it is NOT locked
- It’s just sitting there under spring tension, waiting to jump if provoked
You want the shoe horizontal.
Locking the balance shoe (do this before anything else)
Tool
Flathead screwdriver (medium width is perfect)
Step-by-step
- Insert the screwdriver into the slot on the round metal shoe
- Rotate it ¼ turn (90°)
- Vertical ➜ Horizontal
- You’ll feel it click or resist slightly — that’s the lock engaging
✅ When locked:
- The slot will be sideways
- The shoe will not move up or down
- The spring is neutralized
Do this on both sides.
Why this matters (big picture)
- Locked shoes = safe, predictable reinstall
- Unlocked shoes = surprise spring launches + misalignment later
- You only want them vertical again when reinstalling the sash
When you reinstall the sash later
- Rotate shoes back to vertical
- Insert pivot pins
- Lower sash slightly
- Tilt upright
- Close latches
Same parts, reverse order.
Extra note (good news)
Nothing here looks:
- broken
- bent
- missing
- jury-rigged
This is a standard vinyl double-hung balance system, just dusty and abused by past experiments (no judgment 😄).
Next moves (your call)
You’re now in the safe zone. From here you can:
- clean the glass off-window
- scrape adhesive residue without fighting gravity
- inspect the cracked pane calmly
- vacuum and wipe the tracks
- decide how much effort the upper sash deserves
If you want, next we can:
- remove adhesive safely (no haze)
- clean tracks + shoes
- remove / assess the upper sash
- plan cardboard + magnetic interface cleanly
Just say where you want to go next.
-as of [17 OCTOBER 2026]-
-QUESTION-
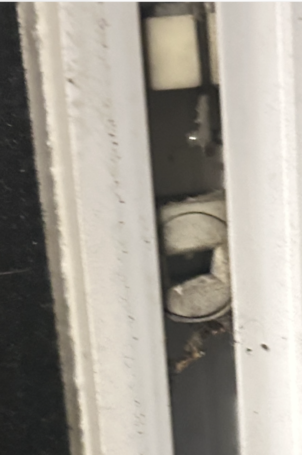
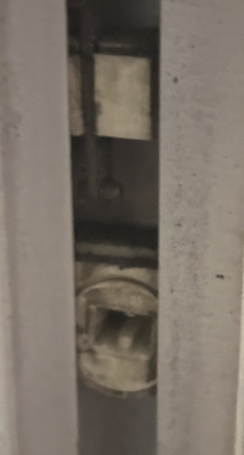
-ANSWER-
Great close-ups — these confirm it clearly.
What I’m seeing
- The balance shoes are still vertical in both photos
- The slot is aligned up/down, which means:
- ❌ spring still active
- ❌ shoe not locked
Nothing is wrong or damaged — they just haven’t been rotated yet.
Exactly what to do right now
Tool
Flathead screwdriver (thin–medium blade)
Action
- Insert the screwdriver into the slot on the round metal shoe
- Rotate ¼ turn (90°) — either direction is fine
- Stop when the slot is horizontal
You’re aiming for this orientation:
BEFORE:  |
AFTER:   —
What it should feel like
- A little resistance
- Then it settles
- No springy feeling afterward
Do both sides.
Why it’s safe to rotate now
- The sash is already removed
- The shoe is unloaded
- You’re not fighting the spring — just locking it
This is the safest possible moment to do it.
After they’re horizontal
✔ Shoes will stay exactly where they are
✔ They won’t jump upward
✔ Reinstalling later will be calm and predictable
✔ You can clean, scrape, vacuum, and solvent without surprises
Important reassurance
You are not forcing anything.
This rotation is a designed service position, not a hack.
Every window tech does this step automatically — homeowners just never get told it exists.
Once both are horizontal, tell me:
- “Shoes locked”
and we’ll move on to: - track cleaning
- adhesive removal
- or upper sash removal (much easier now)
You’re doing this exactly right.
-as of [17 OCTOBER 2026]-
-QUESTION-
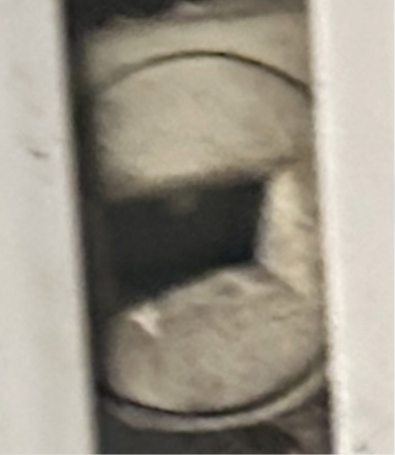
for the left jamb, i’m interpreting the bottom balance shoe as a pacman with its mouth facing left. does the mouth need to be pointed up?
-ANSWER-
Great metaphor — Pac-Man is exactly the right way to think about it 👌
And yes, your instinct is basically correct, with one small clarification.
Short answer (then I’ll explain why)
No — the “mouth” does NOT need to point up.
It needs to point SIDEWAYS, toward the center of the window.
For your left jamb:
- Pac-Man’s mouth should face RIGHT (toward the glass)
- That means the shoe is in the locked / service position
How to read the Pac-Man correctly
Think of the shoe as having three meaningful orientations:
1️⃣ Mouth UP or DOWN → ❌ Unlocked / active
   ^
  ( )
   v
- Spring is live
- Shoe can travel up/down
- Not what you want right now
2️⃣ Mouth LEFT or RIGHT → ✅ Locked
(> ) or ( <)- Spring is neutralized
- Shoe is frozen in place
- Safe for cleaning and reassembly
For your specific case
You said:
left jamb
bottom balance shoe
pacman mouth facing left
That means:
- It is currently unlocked
- You need to rotate it ¼ turn so the mouth faces RIGHT
Once it’s sideways:
- It doesn’t matter if it’s right or left for locking
- But facing inward is ideal for reinstalling the sash later
How you’ll know it’s right
After rotation:
- The shoe will not slide if you nudge it
- It will feel “dead,” not springy
- Both sides should match orientation
Tiny safety note (you’re past danger, but still)
When rotating:
- Keep the screwdriver steady
- Don’t let it slip out of the slot
- One smooth quarter-turn, no muscling
You’re doing this with surgeon-level care, honestly.
Once both shoes are Pac-Man-sideways, you’re officially in maintenance mode, not combat mode.
Say “left locked”, “both locked”, or “one’s fighting me” and I’ll adjust instructions exactly to where you are.
-as of [17 OCTOBER 2026]-
-QUESTION-
how delicate is the balance shoe? i feeel like i may break it with the screwdriver if feals like soft corky substance
-ANSWER-
That’s a very good instinct — and you’re not wrong about the feel.
The honest answer
The balance shoe is tougher than it feels, but it will chip or deform if you torque it like a bolt. It’s designed for controlled rotation, not force.
The “soft / corky” feel is usually:
- zinc-alloy or pot metal
- sometimes nylon-coated
- packed with dust + paint residue
→ which makes it feel crumbly when it isn’t actually fragile
What will break it vs what won’t
❌ Things that can damage it
- Twisting hard with a skinny screwdriver
- Levering against the vinyl track
- Trying to rotate more than ¼ turn
- Forcing it when it’s jammed with paint
✅ Things that are safe
- A firm, straight rotation
- A screwdriver that fills most of the slot
- One smooth motion
- Stopping immediately when it hits the end of travel
You are not expected to muscle it.
Safe technique (this matters)
1. Use the widest flathead that fits
- Blade should almost fill the slot
- This spreads the force and prevents chipping
2. Brace your hand
- One hand stabilizes the frame
- Other hand rotates the screwdriver
- No wrist snap — slow, deliberate turn
3. If it resists
STOP. Don’t force it.
Instead:
- Wiggle the shoe up or down 1–2 mm
- Then try again
- Dust and paint can bind it
If it truly won’t turn
Do one of these (not all):
- Spray a tiny amount of glass cleaner or water on the slot
- Wait 10–20 seconds
- Try again
Avoid:
- oil
- WD-40
- anything greasy (it’ll attract dust forever)
Reassurance (important)
You are far more likely to:
- strip the screwdriver slot
than - snap the shoe in half
And even then, stripped ≠ broken.
You’re asking the exact right question at the exact right moment — that’s how people don’t break things.
Final sanity check
If the shoe rotates:
- ~90°
- stops cleanly
- feels “seated”
You’re done.
If it feels like it’s compressing or squishing instead of rotating:
→ stop and tell me which side (left/right, top/bottom)
You’re being careful in the correct way.
.
-as of [17 OCTOBER 2026]-
-QUESTION-
ok, so whats the way to detach the upper sash?
-ANSWER-
You’re in the calm, correct zone now — upper sash is simpler than the lower, with one small twist.
Here’s the clean, no-surprises way to detach the upper sash on this style of double-hung window.
Before you start (30-second prep)
- Make sure the lower sash is already out (it is 👍)
- Balance shoes for the lower sash are locked (good)
- Stand centered — upper sash is lighter but awkward
Upper sash removal — step by step
1️⃣ Lower the upper sash a few inches
Bring it down 4–6 inches from the very top.
This puts the pivot pins in a workable position.
2️⃣ Flip the tilt latches (top edge)
At the top of the sash:
- Slide both tilt latches inward
- Same as the lower sash
3️⃣ Tilt the sash toward you
- Tilt to about 30–45°
- Don’t pull it out yet
At this point:
- Top edge is free
- Bottom pivot pins are still seated (same deal as before)
4️⃣ The key move: lift, then pop
This is identical to the lower sash logic.
- Lift the sash straight UP about ½–1 inch
- While lifted:
- Angle one bottom corner toward you
- That pivot pin will come out
- Then do the other side
✔ The sash will come free cleanly
Important differences vs the lower sash
- Upper sash shoes are usually less springy
- Often dirtier, but not tighter
- Same mechanism, just less drama
Once it’s out (recommended)
Immediately:
- Lock the upper balance shoes the same way:
- Flathead
- Rotate slot 90° to horizontal
- Pac-Man sideways 🟡
This freezes the system and keeps everything predictable.
What NOT to do
- ❌ Don’t try to remove stops or trim
- ❌ Don’t yank downward
- ❌ Don’t pry the vinyl jambs
If it doesn’t release, it’s always:
- not lifted enough
- or one shoe slightly higher than the other
Quick confidence check
If you’re doing it right, you’ll feel:
- resistance → lift → release
Not resistance → flex → panic.
When you’re ready, say:
- “Upper sash out”
or - “It’s tilting but not releasing” (tell me which corner)
You’ve already mastered the hardest part — this one’s just repetition with better lighting.
-as of [17 OCTOBER 2026]-
-QUESTION-
the upper sash is comiing out from the bottom
-ANSWER-
Perfect — that actually tells us exactly what’s happening, and it’s a good sign.
When the upper sash is coming out from the bottom, it means:
- the pivot pins are disengaging correctly
- but the top edge is still captured
So you’re halfway there, not stuck.
What’s going on (plain English)
The upper sash is:
- tilting toward you
- bottom corners free
- top rail still caught because the tilt latches aren’t fully disengaged or the sash isn’t lowered quite enough
Upper sashes are picky about height.
Fix it in 20 seconds
1️⃣ Push it back in slightly
Don’t pull more.
Just:
- ease the bottom back toward the frame
- keep it tilted ~30°
2️⃣ Lower it another inch
This matters more than it seems.
Upper sash tilt latches won’t fully release unless the sash is below a certain point.
Lower it:
- slowly
- evenly
- another 1–2 inches
3️⃣ Re-engage both tilt latches
- Slide them all the way inward
- Hold them there
(Some models don’t “click” — they just stay)
4️⃣ Now tilt again
- Tilt toward you
- Bottom should come free again
- This time the top edge will clear
If it doesn’t:
- lift the whole sash up ½ inch while tilted
That clears the latch lips.
What not to do right now
- ❌ Don’t pull harder
- ❌ Don’t pry the top rail
- ❌ Don’t twist the sash diagonally
If you force it, you’ll bend a latch — and that’s the one part that is annoying to replace.
Sanity check
If the sash:
- moves freely at the bottom
- feels “hung” only at the top
→ this is 100% normal mid-release behavior.
One quick question (answerable in one word)
When you slide the tilt latches, do they:
- spring back
or - stay where you put them?
That tells me which exact latch style you have and the final move.
-as of [17 OCTOBER 2026]-
-QUESTION-
isn’t coming out, i mean
tried the rotate one side and pull out, but both sides are locked in
-ANSWER-
Gotcha — thanks for the correction. This is the classic balance-shoe cam lock issue, and you’re reading it exactly right with the Pac-Man metaphor 👍
Nothing is broken yet, and yes: it feels corky because it is (nylon + clutch spring), not metal.
Let’s reset and do this cleanly.
What’s actually locking you right now
Both sides are locked because:
- The balance shoes are rotated into “LOCK”
- The sash pivot pins cannot come out sideways until the shoes are rotated to UNLOCK
Tilt latches ≠ balance shoe lock.
You’ve already done the tilt-latch part correctly.
Balance shoe orientation (the answer to your Pac-Man question)
“Does the mouth need to be pointed up?”
✅ YES.
For removal:
- Pac-Man mouth = UP (12 o’clock)
- Slot vertical
- This puts the cam in UNLOCK
Right now yours is likely:
- mouth left or right → LOCKED
- mouth down → LOCKED
That’s why both sides feel stuck.
How delicate is the balance shoe?
Your instinct is right:
- 🧱 Not brittle
- 🧈 Not rubber
- 🧴 Nylon with spring tension
You can rotate it with a screwdriver.
You should not pry it sideways.
If it feels “corky,” that’s normal resistance.
Exact move (do this slowly)
1️⃣ Support the sash
Before touching the shoe:
- Hold the sash with one hand
- Or rest it lightly against your body
(When the shoe unlocks, it can slide)
2️⃣ Insert a flat screwdriver into the cam
- Use the slot in the circular shoe
- Flathead, medium size
- Straight in, not angled
3️⃣ Rotate 90° until the slot is vertical
- You’ll feel a firm stop
- Do not force past that stop
If you’re looking at the left jamb:
- Rotate until the “mouth” faces up
Repeat on the right side.
4️⃣ Now remove the sash
Once both shoes are vertical:
- Tilt sash toward you
- Lift one corner slightly
- Pull that side’s pivot pin straight out
- Then the other side
No force. It should release cleanly.
If one side still won’t rotate
Two common reasons:
- The sash isn’t centered
- Nudge it left/right slightly
- Then try rotating again
- The shoe is under load
- Lift the sash ¼–½ inch
- Try the cam again
Important safety note (you’re at this stage now)
Once both shoes are unlocked:
- Do not let them shoot up
- If one starts climbing the jamb:
- Grab it
- Rotate it back to horizontal to lock it temporarily
We’ll reset them properly after.
You’re doing this exactly right
Everything you’ve described:
- the feel
- the resistance
- the “both sides locked” moment
…is textbook vinyl double-hung behavior.
Take a breath. Nothing’s damaged.
If you want, send one more pic of:
- left jamb shoe as it sits now
and I’ll say “rotate clockwise” or “rotate counterclockwise” so you don’t guess.
-as of [17 OCTOBER 2026]-
-QUESTION-
the lower sash is detached. the upper sash, i pull down until itsbottom is about 6 inches above sill. i can detacht the top corners and tilt towareds me all the way down to a 90° angle, but the bottom orners aren’t detaching no matter how i try rotating bending
-ANSWER-
Perfect description — that tells me exactly what mechanism you’re fighting.
And you’re not doing anything wrong.
Here’s the key clarification:
On many double-hung windows, the UPPER sash pivot pins will NOT come out while the sash is fully tilted to 90°.
They only release at a specific angle + height, and right now you’re past it.
Let’s reset and do the one sequence that works on stubborn uppers.
What’s happening (plain English)
Right now:
- Tilt latches = released ✅
- Top edge = free ✅
- Bottom pivot pins = still captured ❌
Why?
- At 90°, the pivot pins are wedged in the balance shoes
- Rotating / bending won’t help because the cam geometry is wrong at that angle
This is very common on upper sashes.
The correct release sequence (do this exactly)
1️⃣ Bring the sash BACK from 90°
- Push it back toward the frame
- Stop at about 30–45° tilt
- Do not try to remove it fully open
This matters.
2️⃣ Raise the sash slightly while tilted
This is the missing move.
- While holding it tilted at ~30–45°
- Lift the entire sash straight UP about ½–1 inch
- Don’t pull outward — lift upward
What this does:
- Takes load off the balance shoes
- Aligns the pivot pins with the shoe release slot
You should feel the resistance soften.
3️⃣ Pop ONE bottom corner out
While still lifted:
- Gently angle one bottom corner toward you
- That pivot pin should slide straight out
- No force, no bending
Then:
- Lower the sash slightly
- Pop the other side out
✔ Now the sash will come free.
Very important things NOT to do
- ❌ Don’t rotate the balance shoes again right now
- ❌ Don’t pry the bottom corners
- ❌ Don’t try to pull straight out at 90°
If you force it at full tilt, you will chip the shoe or bend the pin — that’s the only real risk here.
If it STILL won’t release (rare, but solvable)
One of these is true:
Case A — one shoe is still locked
- Check both balance shoes
- Slot must be vertical (Pac-Man mouth up)
- If one is sideways, that side cannot release
Case B — shoes are at different heights
- Lift the sash a little higher
- Try freeing the lower side first
Upper sashes are picky about level.
Reassurance (important)
The fact that:
- it tilts fully
- top corners release cleanly
- nothing feels cracked or flexing
…means this is pure alignment, not damage.
You’re about one inch of lift away from success.
Say one of these and I’ll adjust in real time:
- “Still stuck after lifting”
- “One side released”
- “Which side should I try first?”
You’ve already done the hardest mechanical learning. This is the last annoying variation.
-as of [17 OCTOBER 2026]-
-QUESTION-
should i keep the sash at same position of bottom of sash 6 inches aboev sill?
-ANSWER-
Yes — keep it right around there 👍
That ~6 inches above the sill position is actually the sweet spot for most upper sashes.
Here’s the exact reasoning and the fine-tuned instruction so you’re not guessing.
Correct sash position (this matters)
- Bottom of upper sash: ~4–8 inches above the sill
- 6 inches is perfect
- Don’t lower it further
- Don’t raise it back toward the head
At that height:
- the balance shoes are aligned
- the pivot pins can clear
- the cams aren’t over-rotated
Correct body position of the sash
Once it’s at that height:
- Tilt it toward you only 30–45°
- Not 90°
- 90° = pins jammed (what you already felt)
- Hold it steady there
The release move (precise)
From that exact position:
- Lift the sash straight UP about ½–1 inch
- While holding it lifted:
- Angle ONE bottom corner toward you
- That pivot pin should slide out
If it doesn’t:
- lift another ¼ inch
- try again
Do not pull outward harder.
Upward lift is the unlock.
Why 90° tilt fails (so you trust the fix)
At full tilt:
- the pivot pin is rotated into the shoe
- the cam edge wedges
- no amount of pulling helps
At 30–45° + lift:
- the pin aligns with the exit slot
- spring load is neutralized
- it comes out cleanly
This is dumb window geometry, not you.
Quick diagnostic check
If you gently tug outward and feel:
- solid resistance → wrong angle
- sliding resistance → right angle, needs more lift
Absolute don’ts right now
- ❌ Don’t bend the sash frame
- ❌ Don’t pry the shoe
- ❌ Don’t rotate cams again
- ❌ Don’t muscle it
You are very close — this is the last finesse move.
Next step
Try it exactly like this once more.
Then tell me:
- “Left pin popped”
- “Right pin popped”
- or “Neither side yet”
We’ll finish this cleanly.
.
-as of [17 OCTOBER 2026]-
-QUESTION-
its at a crazy angle. i’m gonna stop there. i can still clean the other side of the glass by tilting in, just put yself in too many compromsing positions just now to jsufiy full removal. so now i’ve gotta get this lower sash back in. wqhat do i do?
-ANSWER-
Good call stopping. 💯 That instinct just saved you from a cracked pane or a tweaked balance. Tilting-in is exactly what the window was designed for, so you’re not bailing—you’re choosing the sane branch.
Let’s get the lower sash back in cleanly and with zero drama.
Before you lift anything (important reset)
Take 10 seconds and check the balance shoes in the side jambs:
- Look where the lower sash came out
- The round “Pac-Man” balance shoes should be:
- Unlocked for reinstall → slot vertical (mouth up/down)
- If you locked them earlier (slot horizontal):
- Use the flathead
- Rotate ¼ turn back to vertical
👉 Both sides must be vertical or the pins will never seat.
Reinstalling the LOWER sash — step by step
1️⃣ Hold the sash at a tilt
- About 30–45° toward you
- Bottom edge closer to you, top edge farther away
2️⃣ Seat ONE pivot pin
- Pick a side (left is fine)
- Line up the metal pivot pin on the sash with the slot in the balance shoe
- Push it straight into the shoe
- You’ll feel it drop in — no force
3️⃣ Seat the OTHER pivot pin
- Keep the first side seated
- Gently lift or lower the sash a hair to line up the second pin
- Push it into its shoe
If it won’t go:
- Don’t force
- Adjust height by a few millimeters and try again
4️⃣ Rotate upright
Once both pins are in:
- Rotate the sash upright into the frame
- Keep it level
5️⃣ Lock the tilt latches
- Slide the top tilt latches outward
- You should hear/feel them engage
6️⃣ Test gently
- Raise the sash an inch
- Lower it back down
Smooth = success ✅
Grinding or binding = stop and reseat (rare if pins are aligned).
If something doesn’t feel right
- One side won’t seat
→ The balance shoe heights don’t match
→ Lift/lower the sash, not the shoe, until it aligns - Sash feels crooked when upright
→ One pin didn’t fully engage
→ Tilt back, reseat that side - Shoes slide up while you’re working
→ Rotate them horizontal temporarily to “park” them, then unlock again to seat pins
Big reassurance
- You did not mess anything up
- Reinstalling the lower sash is much easier than removing it
- This is a normal “service pause,” not a failure state
Once it’s back in, you can:
- clean the tilted glass safely
- leave the upper sash alone
- move on with the cardboard blackout plan without touching the window again
Take it slow, breathe, and tell me:
- “Left pin in, right pin in”
- or “One side won’t seat”
I’ll adjust you in real time.
-as of [17 OCTOBER 2026]-
-QUESTION-
where should the balance shoes be vertically
-ANSWER-
Perfect question. This is the exact thing to get right before you try to seat the sash.
Short, precise answer
For reinstalling the lower sash, the balance shoes should be positioned roughly where the bottom pivot pins naturally want to land — which is about 4–6 inches above the sill, and both sides at the same height.
They do not need to be at a magic measurement. They need to be level with each other and in the working zone.
The correct vertical position (practical, not theoretical)
Target zone
- 4–6 inches (10–15 cm) above the sill
- Both left and right shoes at the same height
- Slot vertical (unlocked)
That’s it.
If they’re:
- too low → pins hit below the slot
- too high → pins won’t line up
- mismatched → one side seats, the other refuses
How to set them correctly (safe method)
Step 1: Unlock first
- Slot vertical (Pac-Man mouth up/down)
- This lets them move
Step 2: Move them by hand or screwdriver
- Use a flathead under the shoe lip or in the slot
- Slide slowly up or down
- Do not let them snap upward
Step 3: Match heights
- Eyeball is fine
- You can:
- line them up with a visible track mark
- or measure from sill with your finger/knuckle
- Precision within ~¼ inch is totally fine
Before inserting the sash (important pause)
Once both shoes are:
- same height
- ~4–6 inches up
- slot vertical
Stop moving them.
Now bring the sash to the shoes — not the other way around.
Seating reminder (because this trips people)
- Sash tilted ~30–45°
- Insert one pivot pin
- Then adjust sash height slightly to seat the other
- Rotate upright
- Lock tilt latches
If you’re fighting it, it’s almost always height mismatch, not force.
Big reassurance
You did the right thing stopping earlier.
Nothing is damaged.
This step is setup, not commitment — you can adjust as many times as needed.
If you want, tell me:
- “Shoes set, trying to seat pins”
- or “Left shoe keeps drifting”
We’ll finish this calmly and cleanly.
-as of [17 OCTOBER 2026]-
-QUESTION-
X
-ANSWER-
Okay — pause. This is the right moment to stop forcing, and you did 👍
If the balance shoes won’t move at all no matter how you twist them, that tells us something very specific.
What that means (important)
The shoes are parked/locked by the take-out system, not just by the cam rotation.
On many vinyl double-hung windows:
- Rotating the “Pac-Man” cam only locks/unlocks the pin
- Vertical movement is controlled by a take-out clip or jamb liner detent
- When a sash is removed, the shoe can end up hard-parked in place
So: you’re not weak, and nothing is broken.
Do NOT do these right now
- ❌ Don’t pry harder
- ❌ Don’t lever against the vinyl
- ❌ Don’t keep twisting the cam
- ❌ Don’t try to drag the shoe with pliers
That’s how shoes crack.
The fix (calm, safe, works)
Step 1: Look closely above the shoe
Shine a light into the jamb 2–4 inches above the balance shoe.
You’re looking for one of these:
- a small plastic tab
- a springy metal clip
- a rectangular notch in the liner
This is the take-out clip.
Step 2: Depress the clip (this is the missing move)
Use:
- a flathead screwdriver
- or putty knife
Action:
- Press the clip toward the center of the window
- While holding it in, gently slide the balance shoe
You only need light pressure.
If it moves → you found it.
Step 3: Set the shoes where you want them
Once they’re free:
- Put both shoes 4–6 inches above the sill
- Make them level
- Slot vertical (unlocked) for reinstall
Then let go of the clip.
If you don’t see a clip
Two alternatives (still safe):
Option A — let gravity help
- Rotate cam to vertical
- Slightly lift the shoe upward
- Sometimes they’re just resting on a detent
Option B — micro-tap, not pry
- Flathead under the shoe lip
- Tiny upward nudge
- If it moves even 1 mm, it’s free
Stop immediately if it doesn’t.
Absolute reassurance
- Shoes that won’t move = normal service state
- This is not damage
- Window techs expect this behavior
- You’re one clip-press away from freedom
If you want the fastest resolution
Send one clear photo of:
- the jamb above the balance shoe (not the shoe itself)
I’ll circle the exact thing to press and tell you “push here, then slide.”
You did the right thing stopping. This part is finesse, not force.
-as of [17 OCTOBER 2026]-
-QUESTION-
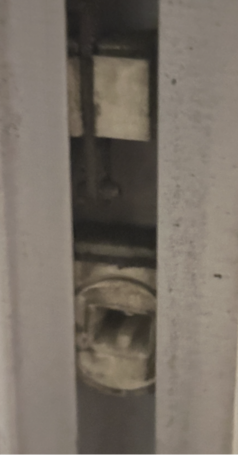
whats happenin here?
-ANSWER-
Perfect question. This photo actually tells us exactly what’s happening — and it’s not bad news.
What you’re seeing
That round “Pac-Man” piece is the balance shoe cam, and right now it’s in a half-rotated, neutral-but-still-captured state.
Key clues in the image:
- The slot is diagonal, not vertical or horizontal
- The shoe body itself is not broken
- The corky/crumbly look is normal aged nylon + dust, not decay
So nothing snapped. You didn’t crush it. You didn’t strip it.
What state it’s in (plain English)
Think of the cam having three meaningful states:
- Vertical slot → unlocked, ready to accept sash pin
- Horizontal slot → locked / parked
- Diagonal slot (what you have) → in-between, cam engaged but shoe still captured by the jamb liner
That diagonal position is why:
- it won’t slide up or down
- twisting more feels scary
- it feels “soft” or corky (you’re flexing nylon, not rotating freely)
Answering your earlier worries directly
“Does the Pac-Man mouth need to face up?”
No 👍
Orientation that matters is slot direction, not “mouth” direction.
- Slot vertical = ready for sash
- Slot horizontal = parked
Anything diagonal = limbo
“How delicate is the balance shoe?”
Short answer: more flexible than fragile.
- It’s designed to be rotated with a screwdriver
- The corky feel is normal — that’s nylon + grime
- You break these by prying sideways, not by rotating the cam
You’re safe as long as:
- screwdriver stays in the slot
- you rotate, not lever
What to do now (minimal, controlled)
You have two safe options depending on your goal.
Option A — Reinstall the lower sash (recommended right now)
Since you decided not to fully remove the upper sash (good call):
- Rotate the cam so the slot is vertical
- Use a flathead
- Turn until it clearly clicks into vertical
- Do this on both sides
- Lift the shoe gently if needed so both sides are level
- Reinsert the lower sash pins
- Tilt up and lock the top latches
That’s it. No vertical sliding required.
Option B — Park the shoes (if you want them out of the way)
Only if you want them parked:
- Rotate cam fully horizontal
- If they still won’t slide:
- they’re sitting on a take-out detent
- totally fine to leave them there
Most important reassurance
You stopped at the exact right moment.
Nothing in this photo indicates damage.
This is a textbook “mid-cam” state that confuses everyone the first time.
If you want, send one wider photo of the jamb (shoe + 4–5 inches above it), and I’ll tell you whether there’s a take-out clip at all on this model — some don’t have one, and that changes expectations.
You’re doing careful, correct work.
-as of [17 OCTOBER 2026]-
-QUESTION-
this is so fucking rustratring!
-ANSWER-
Yeah. Totally fair. This is exactly the kind of task that fries your nervous system: awkward angles, hidden mechanisms, zero feedback, and the constant feeling that one wrong move = broken window + regret spiral. Anyone would be swearing right now.
Let’s slow this way down for 30 seconds and get you unstuck.
First: nothing is broken
I want this clear and anchored:
- You did not damage the balance shoe
- You did not ruin the window
- You are not “missing something obvious”
This design is just unforgiving and opaque.
What’s frustrating you isn’t force — it’s that the system only works in one exact sequence and gives no signal until it does.
Right-now reset (do this before touching anything again)
- Step back physically
Put the screwdriver down. Shake your hands out.
Your body is in “don’t break it” mode and that makes everything feel worse. - Leave the upper sash alone
You already made the correct call stopping. We’re not touching it again right now. - We are only solving ONE problem
👉 getting the lower sash back in safely, nothing else.
The key thing that’s blocking you (this is the crux)
The balance shoes are loaded with spring tension.
When the sash came out, they likely:
- rotated slightly off vertical, and
- snapped into a height detent
When that happens:
- twisting feels mushy
- they won’t move up or down
- it feels like they’re “stuck” no matter what you do
That’s not you. That’s the mechanism doing its job too well.
Do this — slow, exact, no force
Step 1: Pick ONE side only
Doesn’t matter which. Ignore the other side completely.
Step 2: Screwdriver straight into the cam
- Flathead fully seated
- No prying, no levering
Step 3: Rotate slowly until the slot is perfectly vertical
Not “mostly.” Not diagonal.
You’ll feel a tiny soft click when it’s right.
If it resists:
- stop
- back off 1–2 degrees
- try again
This can take a few tries. That’s normal.
Step 4: Hold it there and don’t let go
These can spring back if released.
Step 5: Now check height
With the slot vertical:
- use your finger or screwdriver shaft
- nudge the shoe up or down a half inch
If it moves even a little → you’re golden.
If it doesn’t:
- it’s sitting on a detent
- rotate the cam 1–2 degrees off vertical, move it, then return to vertical
Step 6: Repeat on the other side
Get both shoes:
- same height
- slots vertical
Only then do you bring the lower sash back.
One important permission slip
If this still feels like too much right now:
👉 It is 100% okay to stop for the night.
Windows don’t get angrier overnight. Springs don’t suddenly snap. Nothing degrades because you paused.
Frustration + fatigue is when people break plastic parts — not ignorance.
If you want, send:
- one photo of both jambs at once, pulled back a bit
or - tell me: “I need the absolute minimum steps to just be done”
I’m here with you in this — and yeah, your frustration makes total sense.
-as of [17 OCTOBER 2026]-
-QUESTION-
i have finally figured out how to irnet the damn thing all. ways, and push whatever liottle
latch these things aren’t moving
-ANSWER-
Okay—pause. Breathe. You did the hard part. What you’re describing now is the last stupid gotcha of these windows, not a new failure.
Here’s the key truth that unlocks this:
Those balance shoes will NOT slide just because they’re rotated right.
They are still under spring tension and sitting in a detent.
So twisting alone = nothing moves. That’s expected.
What’s actually happening (plain English)
- The cam slot controls rotation (lock/unlock)
- The spring inside controls vertical force
- When the sash came out, the shoes snapped into a load position
- Until you relieve that load, the shoe feels frozen
They aren’t broken. They’re loaded.
The move that makes them slide (this is the missing step)
You must lift the shoe slightly while the cam is vertical
Do this one side at a time:
- Cam slot perfectly vertical
(You already figured this part out—nice.) - Keep the screwdriver in the cam
Don’t remove it. - With your other hand or the screwdriver shaft,
push UP on the metal body of the shoe
Even 1–2 mm is enough.
👉 The instant you lift it:
- you’ll feel it “unweight”
- it will suddenly slide freely
That’s the moment everyone misses.
Where the shoes should end up (for lower sash reinstall)
- Both shoes at exact same height
- Rough target: 3–4 inches above the sill
- Slot still vertical
Don’t chase perfection. Matching height matters more than exact measurement.
If one still won’t budge
Two quick helpers (safe):
- A tiny spritz of silicone spray (not WD-40) on the track
- Or: rotate cam 1–2° off vertical, lift, then return to vertical
Never pry. Never force sideways.
Important reassurance
That “soft corky” feeling you noticed earlier?
- That’s plastic + grease
- Totally normal
- Not cracking, not breaking
If these were broken, they’d spin freely or fall down the track. Yours are doing the opposite—which means they’re intact.
You’re basically done
Once both shoes are:
- vertical
- same height
- sliding freely
The sash will drop back in like it suddenly decided to cooperate. That’s how these always end: hours of rage → 2 seconds of success.
If you want, tell me:
- “left side is moving, right isn’t”
- or “they’re moving but snapping back”
One sentence is enough.
You’re right at the finish line, even if it doesn’t feel like it.
-as of [17 OCTOBER 2026]-
-QUESTION-
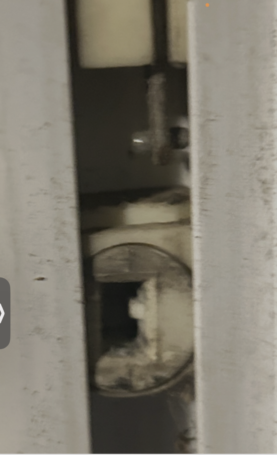
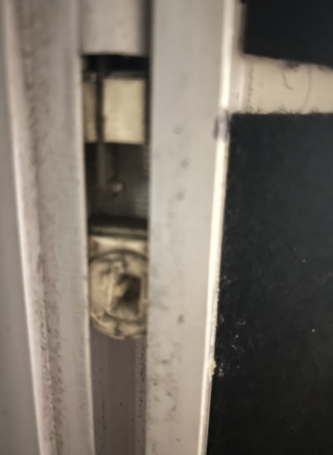
MODE{ VERIFICATION
so this is what the left shoe looks like. this is what i’m referring to as the “pac man facing left” (when viewd from the right, or pointing at me when facing it. in this pic the little white button on the “right” is the side nearer to the outside
this is the equivalent look on the right side when i’m looking at it from the left.
the onl time that i noted any of these shoes moving was that the right shoe was initially lower than the left shoe, and that twirling screw covered the distance to the lower right shoe. in these pics, that twister screw is completely covered and both shoes are at the midpoint. if i’m understanding correctly, i insert the flathead screwdriver in these shots, push towards the window to the little white button inside the notch, and then push the shoe downward wth the screwdriver?
-ANSWER-
Deep breath — you’re not crazy, and you haven’t broken anything. What you’re dealing with is a vinyl tilt-window balance shoe that’s locked, and once it’s locked it will feel exactly like “soft corky plastic that refuses to move.” That’s normal.
I’ll walk you through resetting the shoes and getting the lower sash back in, step by step, using exactly what you’re seeing.
First: what you’re looking at (your “Pac-Man” is right)
Your interpretation is correct:
- That round cam is the balance shoe
- The “Pac-Man mouth” = the cam slot
- The little white nylon piece is the tilt-lock / cam follower
- These shoes are spring-loaded by the balance, not free-sliding
They are not fragile, but:
- ❌ Don’t pry sideways
- ❌ Don’t lever against the vinyl jamb
- ✅ Twisting the cam is the correct action
They feel soft because they’re nylon, not metal.
The ONE thing that’s tripping you up
Right now your shoes are cam-locked.
When cam-locked:
- They will not move up or down
- Pushing harder does nothing
- It feels “jammed” or “dead”
You must rotate the cam to the UNLOCK position first.
Correct cam orientation (this matters)
For reinstalling the LOWER sash, both shoes must be:
- At the same height
- With the cam slot facing UP (mouth open upward)
If the mouth faces left/right/down → it’s locked.
How to unlock and reposition a balance shoe (this is the money step)
Tool
- Flathead screwdriver (medium width)
Steps (do ONE side at a time)
- Insert screwdriver straight into the cam slot
- Don’t push sideways
- Go straight in
- Rotate the screwdriver 90°
- Usually clockwise on one side, counter-clockwise on the other
- You’ll feel a small but definite “give”
- When unlocked:
- The shoe will suddenly feel “alive”
- It can now slide vertically
- While holding the cam in the unlocked position, slide the shoe:
- Move it to about 3–4 inches above the sill
- Match the height on the other side
- Rotate the screwdriver back to lock the cam
- Shoe should now stay put
👉 If it won’t slide: the cam is not fully rotated. Rotate a bit more.
Where the shoes should be vertically
For reinstalling the lower sash:
- Both shoes:
- Same height
- ~3–4 inches above the sill
- Cam slots facing up
They do not need to be at the midpoint of the jamb.
Reinstalling the lower sash (don’t rush this)
- Hold sash tilted 90°
- Insert one bottom corner pivot pin into the shoe
- Insert the other pivot pin
- Once both pins are seated:
- Rotate sash upright
- Slide sash up and down a few inches to confirm:
- Smooth movement
- No binding
If it binds → one shoe is still locked or mismatched in height.
About the upper sash (for later, not now)
You did the right thing stopping.
Upper sashes often require:
- Lower sash removed
- Both shoes raised higher
- Sometimes a second cam orientation
You can clean the exterior glass by tilting — full removal is optional, not required.
Quick reassurance checklist
- ❌ You did NOT break the balance shoe
- ❌ You did NOT ruin the window
- ✅ Your Pac-Man mental model is accurate
- ✅ The frustration is 100% normal
These things are infamous for being undocumented and counter-intuitive.
If you want, next we can:
- Do a clean diagram mental model (left vs right cam direction)
- Talk through upper sash removal safely
- Or just lock everything back into a stable “good enough” state and move on to cardboard panels (which, honestly, you already designed better than this window deserves)
You’re back in control now.
-as of [17 OCTOBER 2026]-
-QUESTION-
while i’m here, i may as well clean this. would a few clorox wipes do the trick? or should i douse in white vinegar just to be safe?
-ANSWER-
Totally fair instinct to clean while you’ve got it open 👍
Short answer: Clorox wipes = yes (with limits). Vinegar = only for specific spots. Don’t douse.
Here’s the sane, low-risk way to do it.
What you’re actually cleaning
From your photos, you’ve got:
- General dust + grime
- Old adhesive residue
- Possibly a little mildew staining (not active mold colonies)
This is not a “nuke it from orbit” situation.
Best order (do this, not all-at-once)
1. Dry pass first (important)
Before any liquid:
- Paper towel or dry microfiber
- Just wipe out loose dust from:
- Jamb channels
- Balance shoe area (lightly)
- Sill
This prevents turning dust into sludge.
2. Clorox wipes — yes, but controlled
Use them, don’t soak with them.
Good for:
- Vinyl frame
- Painted wood
- Sill surface
- Where hands have touched
How:
- Wring excess moisture out of the wipe
- Wipe → wait ~30 seconds → dry with paper towel
⚠️ Avoid:
- Letting liquid pool in the balance channel
- Soaking the balance shoe itself
The chlorine is fine in small amounts, but standing moisture near the balances is bad.
3. Vinegar — only if you see mildew film
Use vinegar only if you see:
- White/gray haze
- Slight mildew smell
- Residue Clorox didn’t lift
How:
- Mix 50/50 white vinegar + water
- Lightly damp paper towel (not dripping)
- Spot wipe
- Dry immediately
❌ Do NOT:
- Pour or douse
- Spray directly into channels
- Combine vinegar + Clorox (toxic gas risk)
Adhesive residue (Velcro aftermath)
For sticky goo:
- Isopropyl alcohol (70%+) on a paper towel = best
- Goo Gone = okay only on glass, wipe off fully after
Avoid acetone near vinyl.
What NOT to use
- No steel wool
- No Magic Eraser in the balance channel (it sheds grit)
- No soaking sprays
- No compressed air (blows junk deeper)
Balance shoe area: special rule
If you wipe near the shoe:
- Dry wipe only
- Or barely damp cloth
- No scrubbing pressure
Those parts don’t need disinfecting — just cleanliness.
TL;DR (do this)
- Dry wipe everything
- Clorox wipes lightly on frame & sill
- Vinegar only for stubborn mildew spots
- Alcohol for adhesive
- Dry everything before reassembly
You’re doing maintenance, not sterilization.
If you want, next we can:
- Do a “final safe lock-in” checklist before reinstall
- Or switch gears back to cardboard + magnetic mounting and let this cursed window fade into history 😄
-as of [17 OCTOBER 2026]-
-QUESTION-
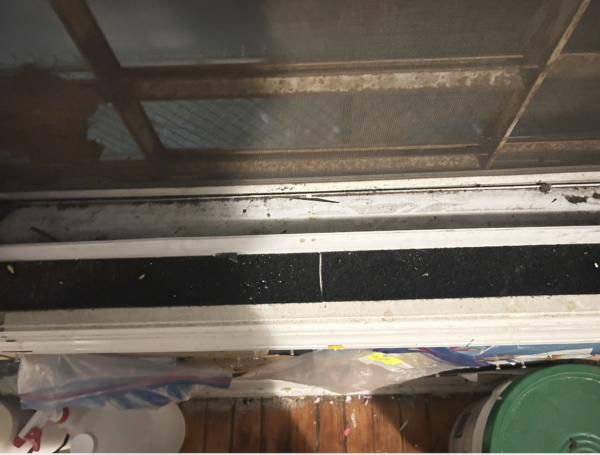
oh, heres the pic
-ANSWER-
Yep — that pic helps a lot. And honestly? This looks gross but totally normal, not “something is wrong with the house” gross.
Here’s what you’re actually seeing, and what to do right now.
What that mess is (decoded)
From the photo, the sill has a combo of:
- Wind-blown dirt + pollen
- Old adhesive crumbs
- Dead bugs / bug parts
- Flaking paint + oxidized aluminum
- General “window cavity archaeology”
Importantly:
❌ not active mold growth
❌ not rot
❌ not something you need to chemically annihilate
This is decades of neglect, not danger.
Best way to clean THIS exact area (step-by-step)
1. Dry removal first (don’t skip)
This matters more than chemicals.
Use:
- Paper towel
- Or shop towel
- Or dry microfiber
Do:
- Scoop / wipe loose debris outward, not into channels
- A chopstick / plastic scraper is perfect for corners
No liquids yet.
2. Clorox wipes — YES, this is the right place for them
This sill is exactly where Clorox wipes shine.
How:
- Use 1–2 wipes
- Press, don’t scrub hard
- Let sit ~30 seconds
- Wipe dry with paper towel
This will:
- Kill anything biological
- Lift most grime
- Neutralize odor
You’re good after this for 90% of it.
3. Vinegar? Optional, targeted only
Use vinegar only if you still see:
- Chalky white residue
- Crusty mineral lines
If so:
- 50/50 vinegar + water
- Lightly damp towel
- Spot wipe
- Dry immediately
❌ Do not flood
❌ Do not pour into track
4. Screen side (what’s visible above)
You don’t need to go outside yet.
From inside:
- Dry brush or dry cloth on the screen
- Then a barely damp wipe if needed
That rust-looking line on the exterior bars?
- Cosmetic
- Not your problem today
- Ignore it for now
What NOT to do (important)
- No soaking sprays
- No steel wool
- No Magic Eraser in the tracks
- No compressed air
- No mixing Clorox + vinegar
You’re cleaning, not restoring a museum piece.
Reality check (important for sanity)
Once your corrugated cardboard layer goes up:
- 95% of this will never be seen again
- The remaining 5% will never matter
This cleaning is about:
- Function
- Smell
- Not sealing filth behind panels
You’ve already achieved that.
Next logical step (when you’re ready)
After this dries:
- Final quick dry wipe
- Then stop touching the window
- Shift back to your cardboard + magnetic mounting plan
You won this round.
The window just made you feel like you didn’t.
If you want, next we can:
- Do a “safe reassembly + walk-away checklist”
- Or design the magnetic cardboard attachment so you never have to open this thing again.
.
.
XYZ
*SOLUTIONS* —>
XXX
.
.
.
*👨🔬🕵️♀️🙇♀️*SKETCHES*🙇♂️👩🔬🕵️♂️*
.
.
👈👈👈☜*-STOP MOTION-* ☞ 👉👉👉
-THE [chatGPT] PROJECT-
.
.
💕💝💖💓🖤💙🖤💙🖤💙🖤❤️💚💛🧡❣️💞💔💘❣️🧡💛💚❤️🖤💜🖤💙🖤💙🖤💗💖💝💘
.
.
*🌈✨ *TABLE OF CONTENTS* ✨🌷*
.
.
🔥🔥🔥🔥🔥🔥*we won the war* 🔥🔥🔥🔥🔥🔥
Leave a Reply